Monday, November 28, 2011

Minestrone Soup with Tortellini


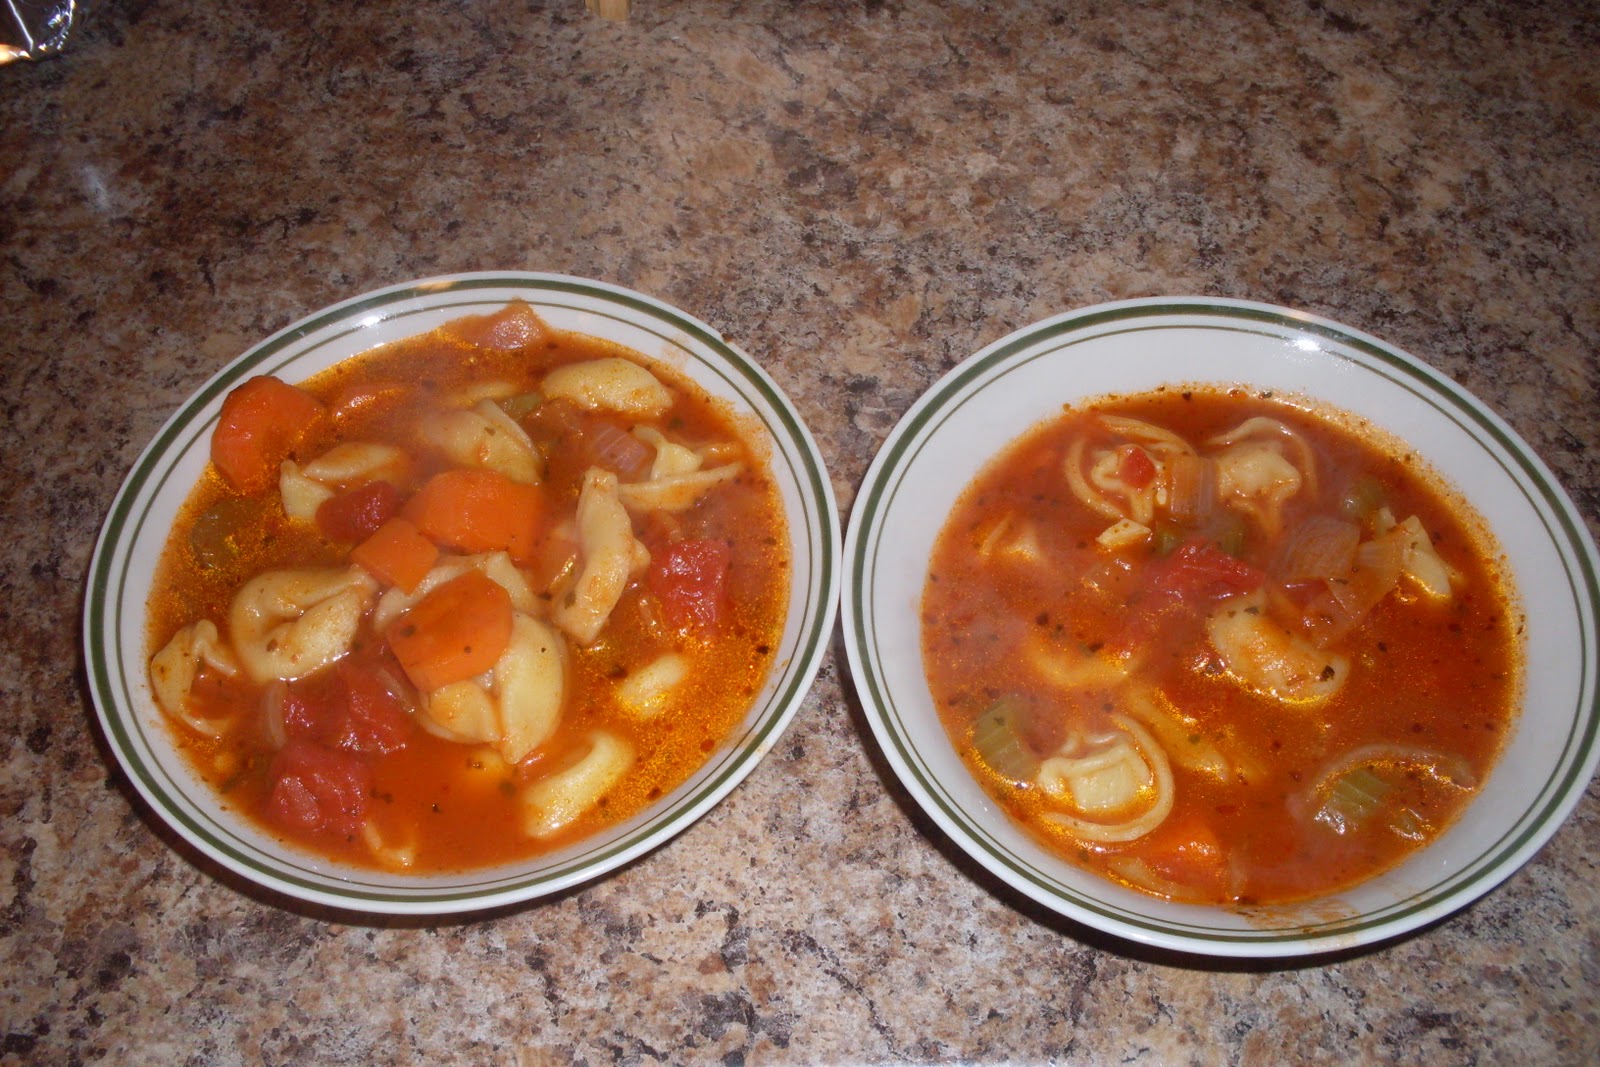
Loosely translated from Italian, Minestrone means "The Big Soup". You will be able to find many different recipes for this soup, as the ingredients are not set in stone. I found this recipe in my pressure cooker cookbook. I vaguely remember usually seeing beans anytime I have had minestrone, but this recipe did not include any.

  • 2 Tbsp olive oil
  • 1 onion, chopped small
  • 2 stalks celery, cut into 1/4 inch slices
  • 2 carrots, cut into 1/4 inch slices
  • 1 Tbsp minced garlic
  • 8 ounce package cheese tortellini
  • 4 cups vegetable broth
  • 1 jar spaghetti sauce
  • 1 can diced tomatoes
  • 1 1/2 tsp Italian seasonings
  • 1 tsp sugar
  • 1/4 tsp ground pepper
Add the oil to the pressure cooker and set to brown or high, with the lid off. Saute onions, celery, carrots, and garlic until onions begin to sweat. Add the remaining ingredients and stir. Lock on the lid and cook on high for 5 minutes. Perform a quick release. Check tortellini. If it is too al dente for your liking, continue to boil on high or "brown". Garnish with Parmesan cheese, if desired.


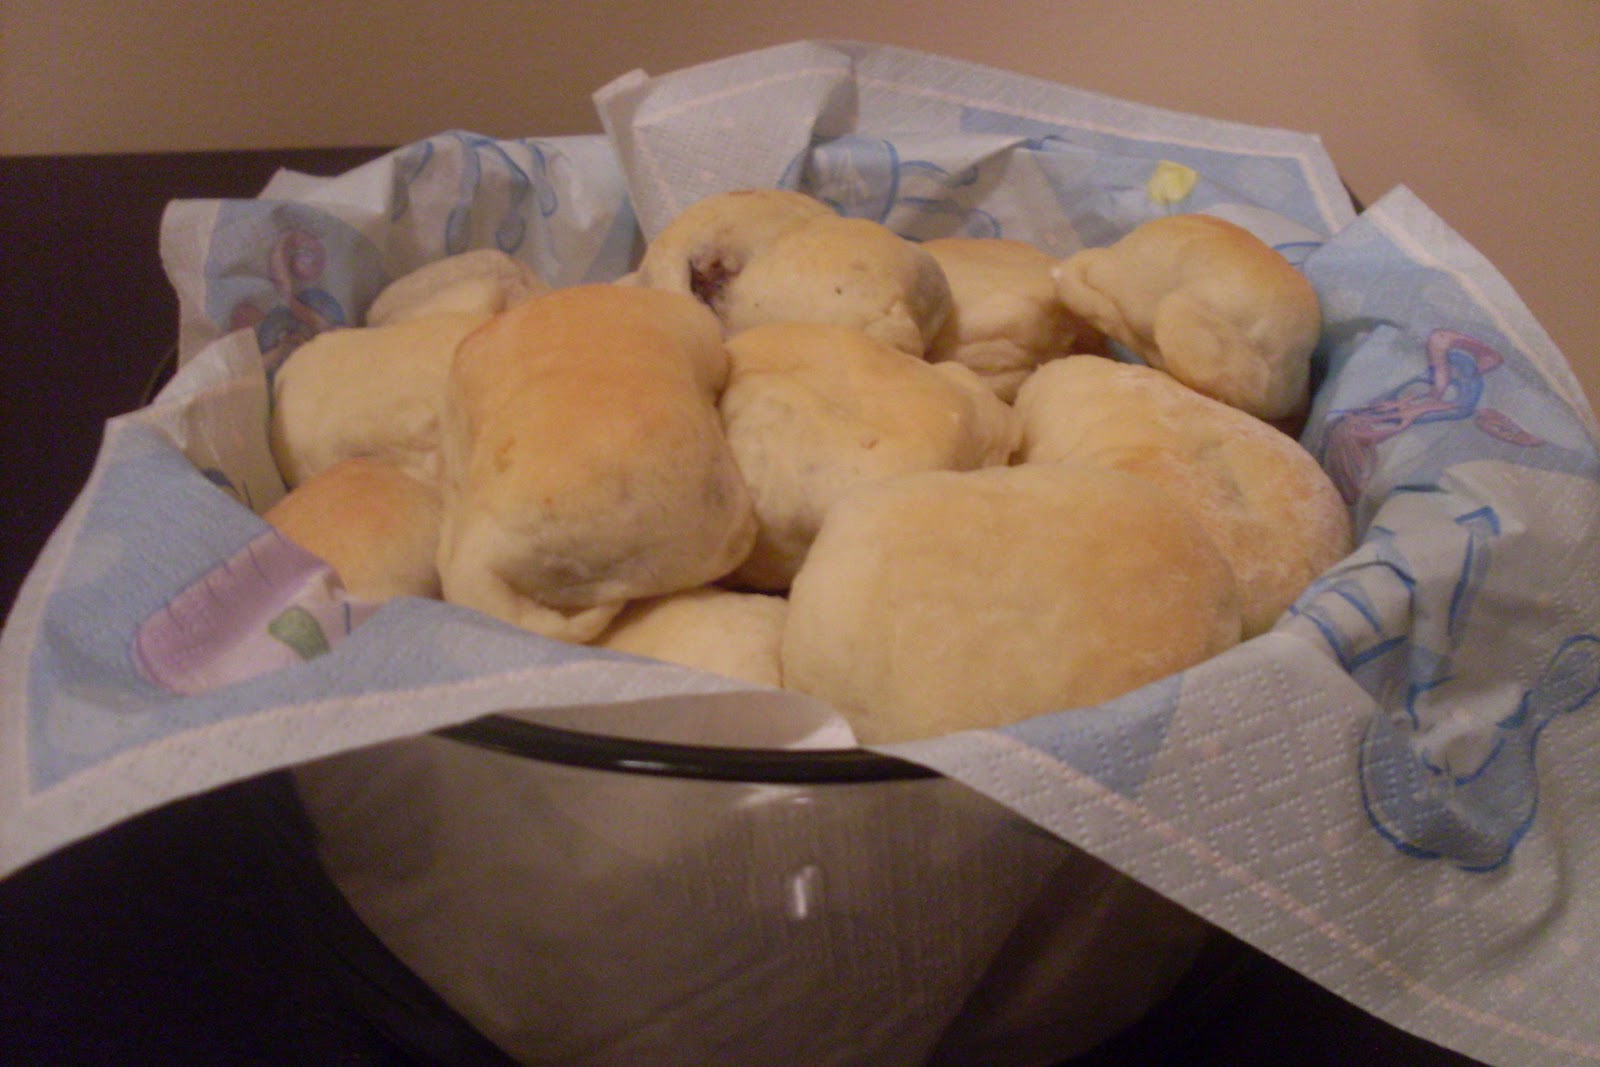
I like to eat. A lot! I like big portions, which is probably my #1 battle when it comes to weight loss. It bugs me deep down to my core to just have soup as a meal. Soup is a side to be paired along with a sandwich or an appetizer to a dinner. Soup can never be just the meal. See what I mean? If I am to change this body, I need to change the thinking. Tonight's dinner was just the soup. I had a large lunch which consisted of a  veggie parmesan sandwich that came with fries, so I rationalized that I could handle just soup for dinner. OK, I did add one slice of buttered (margarined) toast with it. This soup really is meant to be a meal. It was absolutely delicious and filling. I will confess to going back for seconds. I especially liked the carrots! Maybe next time I make it I will add a third carrot to the mix.

I did cheat a teensy tiny bit on this Meatless Monday thing with this soup. I only had 3 cups of vegetable broth left in my freezer, so I used a cup of chicken broth make up the rest. Since I do not claim to be a vegetarian and I did not use any new meat to make this meal I will let it slide. Plus the chicken broth was made as to not waste any chicken pieces or vegetables, so in all it was beneficial. I also left out the sugar that the recipe called for. With so many other delicious ingredients, I didn't think the extra sinful ingredient would be needed. Definitely not! This soup was absolutely delicious. Even Sophia thought so! She was literally raving to me about how tasty it was. I never get too many rave reviews from her, as it is usually a struggle to get her to eat a decent portion, but she loved it!
"Woah!" So I ask, whats up? "My belly says its yummy!"
"Mom, I'm not even gonna lie. This is really good."
"I like this soup to 100."
Those are only some of the quotes from her. Tortellini is probably one of her favorite pastas. I don't know why she loves these little cheese filled circles more than even the cheese filled squares of ravioli. I don't cook them too often, but anytime we have them, she gobbles them up. She ate all the tortellini's out of the soup before she started working on the rest of it.

There was only one problem with this soup. Being mainly liquid based in the pressure cooker, when I performed the required quick release, not only steam rushed out of the escape hole. It started spewing hot drops of soup right out the top! I had soup all over the front of my cabinets and all along the counter tops. When I realized this was happening, I held a paper towel over the hole in an attempt to catch the flying drops, only to burn my fingertips. I will definitely be making this soup again at some point, so I am contemplating allowing it to perform its own natural release for a while before letting the extra pressure escape. I am scared this method will make the tortellinis cook too much and become mush. In the mean time, I was able to clean the mess up quickly with a damp sponge before it dried. Not too much harm done....

Sunday, November 27, 2011

Officially Christmas Season!

It is officially the Christmas season and I love it! As much as a can seem to be a scrooge about Christmas before Thanksgiving, I really do love it. I just with people could wait for Thanksgiving season to be over to start the Christmas celebrations!

This weekend, my family and I kicked Christmas off right! We set out of Philadelphia towards Reading. Along the way, we drove through Lancaster and saw how the Amish lived. I was super excited to see a Sheetz, though I did not have the chance to go in :( Sheetz is very much like a Wawa. Most Philadelphia locals would kill me for saying it, but I would prefer to have a local Sheetz over a Wawa. While in Amish county, we went to Shady Maples for a Smorgesbord breakfast. After breakfast we continued along to Reading to the hotel my mother got us for the night. Once it was dark we set out to Koziar's Christmas Villiage. The adventure to the Christmas Village was a bit more exciting than the actual light show! My mother's GPS showed us an off the beaten path way to get there. When I say "off the beaten path" I mean not even paved at some parts. This road did take us around all the traffic waiting to get in and gave us some good laughs (while my sister was having heart palpitations over the fear of what we would find in the woods we were driving through). The lights at Koziars were very nice, but it was way too crowded for my liking.

This morning, we decided to take the drive to Hershey. We didn't do the rides or drive through the light show, but we had so much fun. We stuck to the indoor attractions in their chocolate world. There was a 3-D movie which was amusing for the kids as well as historically educational for the adults. Then we went on a ride through the tour of the factory. The original factory was closed in 2010, so they have a 10 minute ride on tour of a simulated process of making the chocolate. My brother and I are debating whether the new chocolate factory is in West Hershey or Mexico. I'd like to think it moved just across town instead of out of the country. After the tour we did some shopping and then made our own candy bars. This process was way different than what I thought it was going to be, but I was very pleased with the results. Everyone was able to pick their type of chocolate and fillings; then watch it me made through the machines. Then we were able to design a label for our bars. We then had lunch in the cafeteria area. Little did we know, Santa was there and available for pictures!! We got a big family picture with my sister and brother plus all the kiddies. After some bribing, Sophia agreed to sit alone with Santa for a picture. I had to buy her a special treat. Luckily I got away with a personalized Hershey Kiss magnet. It really was a great weekend. I spent no time cooking, but it was worth it. I picked up some dinner at Wawa tonight, though I am still craving Sheetz. One food fact I learned about myself this weekend: I really do not like scrambled eggs at all anymore. Over medium or poached is the way to go, for me.


Friday, November 25, 2011

Sweet Potato Biscuits

  • 1 1/4 cups whole wheat pastry flour
  • 1/2 cup white flour
  • 2 tsp baking powder
  • 1/2 tsp salt
  • 3 Tbsp margarine
  • 1/3 cup apple juice
  • 1 cup cooked mashed sweet potato
  • 3 Tbsp honey
  • 1/2 cup finely chopped walnuts
Preheat oven to 425. Sift together the flours, baking powder, and salt in a mixing bowl. Work in the margarine until mixture resembles coarse meal. Add apple juice, sweet potato, honey, and nuts. Work them into a soft dough. Turn the dough out onto a well floured surface and kneed in just enough flour to make dough lose its stickiness. With floured hands, divide dough into small balls and arrange on a lightly greased baking sheet. Pat the top of each ball to flatten it slightly. Bake 12-15 minutes.


I probably will not ever make these biscuits again. This was the recipe I was most excited to make for Thanksgiving, yet it turned out the worst. While kneading out the dough, no matter how much flour I added it remained very sticky. I am assuming this is because of the honey, but who knows. All I know is I had the dough stuck to every one of my fingers and no amount of flour made it better. This stickiness made shaping them into balls impossible so I wound up just plopping them onto the baking sheet, which resulted in a not so nice looking result. The flavor left a lot to be desired. I don't know if it was the amount of flour I tried to use to make the dough less sticky, but they were very bland. This is definitely not going to be a repeat.

Thursday, November 24, 2011

HAPPY THANKSGIVING!!!!!!!


The comics are my favorite section of the newspaper!

Pumpkin Pie


This is a Thanksgiving staple! Who could host Thanksgiving without a Pumpkin Pie? It is probably the second most important food item after the Turkey. I am not hosting dinner this year, that is something I hope to never do. It is too much for me. My wonderful sister, who I am most thankful for, is hosting dinner at her house. I am bringing pies (only the pumpkin is homemade, the others I get through Sophia's dance class fundraiser), homemade cranberry sauce, and sweet potato biscuits. This is my favorite holiday, probably because it includes most of my favorite foods and it comes with a free pass to eat all I can. And I can eat!! Last night, my trainer and I decided I'm going to attempt to lose close to 20 lbs, so this will also be kind of a last hoorah! HOORAH!!!! God, am I corny.

  • A pie pumpkin (small round and about 6-8 inches)
  • 1 cup sugar
  • 1.5 tsp ground cinnamon
  • 1 tsp ground cloves
  • 1 tsp ground allspice
  • 1/2 tsp ground ginger
  • 1/2 tsp vanilla extract
  • 1/2 tsp salt
  • 4 large eggs
  • 1.5 cans evaporated milk
Crust:
  • 1.5 cups flour
  • 2 Tbsp sugar
  • 1/2 tsp salt
  • 1/6 cup (1 oz) cold vegetable shortening (breaks down to 2 Tbsp and 2 tsp)
  • cold water
To make crust: Mix flour sugar and shortening first. Do not make it too smooth, try for pea sized granules. Sprinkle in some cold water to make it dough consistency. Roll out dough between two pieces of wax paper. Use some flour to keep it from sticking. Remove top piece of wax paper and flip dough into pie pan and shape. Press into pan and seal any broken areas. Remove wax paper before filling.


Make Pumpkin Puree with the pumpkin. Mix all pie ingredients. Pour into pie crust. Cover edges of crust with foil to prevent burning. Bake at 425 for the first 15 minutes then turn down to 350 and bake for 45 to 60 minutes. When a knife comes out clean, the pie is done.


Crust protectors are available for purchase at kitchen supply stores.
Or you could do this.
So what recipe would be complete without a disaster or two? I had to run around to 3 different places Tuesday night to find a pie pumpkin. Everywhere has all their Christmas stuff up, but right when everyone should be giving thanks and making pie, I couldn't find a damn pumpkin! I eventually did find one, but next year I will be pureeing some pumpkin at Halloween time and freezing it for Thanksgiving. My last resort would have been mixing the bit of puree I have in my freezer with some of a can, but as you know, I am not a huge fan of the shortcuts that are infused with crap.

As I was mixing my pie ingredients I accidentally poured a bit more than 1 and a half cans of evaporated milk into the mix. Since other ingredients were already in the bowl, there was no way of sifting the extra out. The filling looked very liquidy and as it is my first time I was not sure if it would solidify correctly. I added a tsp of corn starch to thicken it up a little. It looks to be OK...keeping my fingers crossed for the final taste test.

I really hope my pie turned out delicious. I have not tried it yet, since I can't cut into it until dinner is done this afternoon. This post will probably be updated once I get everyone's reactions. The pie ingredients made much more filling than would fit in the crust. Instead of wasting it, I decided to make Naked Pumpkin Mini's. Aka: Cupcake sized pies with no crust.


Family Reaction: Just about everyone seemed to like my pie. The filling was pretty delicious. I was scared it would be too clovey, but not at all. My brother in law said it was too moist for his preference, which could have been due to my over pouring of the evaporated milk. I didnt like the crust. It seemed a bit chewy or soft or something. I am going to look into a new recipe for pie crust.

Wednesday, November 23, 2011

Cranberry Sauce


I am going to share two cranberry sauce recipes with you. I originally was going to do the recipe I found in my pressure cooker book, but then I found one that was less calories for the crock pot. So I decided to use the crock pot, until my week got really busy. I have no time to sit around for a 7 hour recipe, especially since the last two hours of cooking are a little more hands on than most crock pot recipes. I decided to combine the two, using the ingredients for the crock pot but the time instructions for the pressure cooker. Doing this blindly and hoping for the best, basically.

Pressured Cranberry Sauce:
  • 12 ounces fresh cranberries (about 3 cups)
  • 1 cup sugar
  • 2/3 cup water
  • 1 tsp orange zest
Combine all ingredients in pressure cooker and stir. Securely lock on lid an cook on high for 6 minutes. Let the pressure release naturally for 5 minutes before performing a quick release. Stir sauce, smashing cranberries until the sauce is your desired consistency. Let sit an additional 5 minutes to firm slightly before serving warm. Refrigerate a few hours or overnight if you prefer to cold cranberry sauce.

Skinny Crocked Cranberry Sauce:
  • 12 ounces fresh cranberries
  • 1/2 cup orange juice
  • 1 cinnamon stick
Combine all ingredients in the crock pot and cook on low 4 to 5 hours, until berries are soft. Remove lid and cook on high 2 to 3 more hours. Removing the lid allows the cranberries natural juices burn off. Stir occasionally. Chill in fridge overnight.


I used the ingredients for the crock pot recipe and used the instructions for the pressure cooked recipe. I also added 1/2 cup of water, because more liquid is usually needed to cook in the pressure cooker. I doubled the recipe, because I love cranberry sauce and I wanted to make sure there was enough for me to have some leftovers! We will also be having the jelly kind from the can, because I do love that as well! I don't think I have ever actually had real homemade cranberry sauce.

The texture of the sauce looks great. It was way too tart though! Real cranberry sauce is supposed to be tarter than the canned stuff, but this was too much for me. I had to add about 4 tbsp of sugar. Lesson learned: Thanksgiving is not the time to be worried about "skinny" recipes!

Monday, November 21, 2011

Stuffed Sweet Potatoes


  • 2 large or 4 small sweet potatoes
  • 1 can black beans
  • 1/2 onion, diced
  • 1 bell pepper, diced
  • 1 cup salsa
  • 1 cup frozen corn
Preheat oven to 400. Wash potato and puncture all over with a fork. Bake until soft, anywhere from 45 minutes to an hour and a half. Saute onion and peppers. Drain and rinse beans and add to peppers and onions. Sprinkle with salt and pepper, then cook on medium low. Add salsa and frozen corn. Stir well. When potatoes are ready, cut and fluff them. Top with bean mixture. Serve with extra salsa, butter, sour cream, or shredded cheddar cheese.


Yummy! It is like Mexican sweet potato. I served it alongside green beans, as you can see. I also wanted to do some rice, but ran out of time and I was too hungry to wait. The rice wasn't needed though. I wound up eating a potato and a half smothered with deliciousness. I topped mine with margarine, the bean mixture, sour cream and shredded cheddar cheese. Probably not the most healthy way to go, but with a plate full of veggies I'm going to tell myself it was OK. The black beans made this very filling and the flavors together were absolutely delish! As an entree or a side dish, I will definitely be making this again!

When I served Sophia her meal, I gave her the sweet potato separate from the filling. She ate up the sweet potato and green beans, but the filling she had a bit of a problem with. She told me it was too spicy, even though it was not spicy at all. I think she gets scared of beans. We know she does not like baked beans (I don't either) so I think she associates other beans as tasting like them. She has had beans in meals that she liked. Most of the time I don't tell her she is eating beans until after she eats them. When she asks what is on her plate, I just tell her its a vegetable. Gotta keep chipping away at those finicky little taste buds!

My girlfriend Melissa came to dinner tonight. She is one of my favorite people to cook for, as she is such a great audience! She loves to eat and is so appreciative of my meals. Plus she is a very adventurous eater, so she will try anything. My meals can't even touch some of the exotic things she has told me she ate. Congealed pigs blood anyone? When I eventually try my beet soup recipe, she will be my Guinea pig. She was a huge fan of this meal! Sometimes it is so nice to have someone cooking my meals that wont argue with me to compromise on how many bites they must eat. It is extra special when I am not the only one going back for seconds!


Misa Misa and the Little Miss on the beach this past summer.


Sunday, November 20, 2011

Cheesy Baked Ziti


  • 1 lb ziti, cooked and drained
  • 15 oz ricotta cheese
  • 8 oz mozzarella cheese
  • 1 egg
  • 1 tsp salt
  • 1/4 tsp ground pepper
  • 31/2 cups sauce
  • 1/4 cup Parmesan cheese
Mix ricotta, mozzarella cheese, egg, salt, pepper, and 1/2 cup sauce. Gently fold in ziti and stir until well coated. Spread 1/2 cup into the bottom of a baking dish. Pour ziti mixture evenly in dish. Top with remaining sauce and sprinkle with Parmesan cheese.
Bake at 375 for 30 minutes. Sauce should be bubbling and top should be browned. Let stand 10 minutes before cutting.


I wound up tripling this recipe. Today was my youngest nephew, Christopher Gregory's Christening. We had a luncheon party at my sisters house, so members of the immediate family each brought a dish. We also had ham, roast pork, and chicken de van (a recipe I need to convince my sisters mother in law to share!). This recipe is so simple to make. The only change I would make is adding some more sauce into the cheese mixture. I am a huge fan of sauce, so it is really just a matter of personal preference. I wanted to make homemade ricotta cheese for it, but I needed a large amount and just didn't have the time. Everyone seemed to enjoy this ziti, I would definitely recommend making it when hosting a party.


Christopher Gregory - Today's Main Man


Friday, November 18, 2011

Acorn Truffles


Well these turned out a mess. I never claimed to be a master decorator. That is why I have my sister. She does beautiful custom cakes as a little cottage industry. Eventually I may be sharing some pictures of her creations. Anyway, I am not her. That is why my chocolate coatings turned out looking like crap. I think the one right in the middle looks the most like an acorn.

  • 16 oz package chocolate chip cookies
  • 1 package cream cheese
  • 1 package chocolate chips/morsels
  • 1/2 tsp vegetable shortening
  • 1/2 cup finely chopped pretzels
  • Mini pretzel rods cut in half
Line baking sheet with wax paper. Crumble cookies into food processor and process until mixture resembles coarse meal. Fold into cream cheese until it holds together. Roll into 1 1/4 inch ovals.
Microwave morsels and vegetable shortening 30 seconds. If not fully melted continue to microwave in 10 to 15 second increments until fully melted. Dip truffle in the chocolate to coat and then dip one end into pretzel pieces. Insert mini pretzel rods in top. Refrigerate 30 minutes.


I had originally planned this recipe as a fun activity to do with Sophia and her friend Ava. The kids were so excited to do a special treat project, until it was time to actually do the project. They decided they were having too much fun to stop running around, so I went at it alone. I made such a mess! I tried using my blender to process the cookies. No such luck. I think it actually started smoking. How many days till Christmas, when Santa brings me a new one?? I wound up putting the rest in a large Ziploc bag and crushing them. That is also what I did to finely chop the pretzels. Coating the balls was a project in itself. My fingers were covered with chocolate! Once the balls were covered it was hard to pull them out of the melted chocolate, because they would smush if I got a tight grip on them. The recipe said it was going to yield 36 acorns, but I gave up after my first tray was full. They did wind up delicious and pretty festive looking. Definitely something I would like to eat again. I may just pass this on to my sister to see if she can possibly make them a bit more pretty looking...


PS... the first step of my original recipe was "Preheat oven to 350." Then at no point in the rest of the recipe does it say anything about baking these little guys. Beats me...

Thursday, November 17, 2011

Chicken Pot Pie Casserole


Filling:
  • 1 bag mixed veggies
  • 2 cups cubed chicken, cooked
  • 1 can condensed cream of chicken soup
  • 1 cup milk
  • 1/4 cup pancake mix
  • 1/4 tsp ground black pepper
Crust:
  • 1 cup pancake mix
  • 1 cup water
  • 1 Tbsp parsley
  • 1/2 tsp dried rosemary or basil
To make the filling: Whisk together soup, milk, pancake mix, and ground pepper. Combine with chicken and veggies in a skillet and cook over medium heat for 4-5 minutes, stirring occasionally. Pour into a 2 quart casserole dish.
To make the crust: Whisk together pancake mix, water, parsley, and rosemary or basil. Slowly pour an even layer over the chicken mixture.
Bake 30-35 minutes. Cool for 5 minutes before serving.

This was another recipe I found on food packaging. This recipe came off the side of a box of pancake mix. Chicken pot pie is a great comfort food, so I was super excited to make this. The prep work is really not all that hard and most of the cooking time is baking (hands-off!). Not sure if you have caught on yet, but I tend to change some aspects of most of my recipes. The original recipe called for a mixed bag of cauliflower, broccoli, and carrots. Great mix of veggies, but I felt the pieces would be too big for my idea of a pot pie. I have always had pot pie with smaller, more bite sized vegetables, so I figured a bag of frozen mixed veggies would work.

As promised, I will share with you my mini disaster. I decided to take a nap before I made dinner. I am so luckily to have a child who will allow this (for the most part). I am a very heavy sleeper, so when I wake up I am usually in a fog, for a bit. I glanced over the recipe last night to make sure I had all my ingredients on hand to make the pot pie. So as soon as I got up from my nap, I started cutting my chicken and combining my filling ingredients. Only when the filling ingredients were all together did I notice the chicken was supposed to be pre-cooked! I am hoping if I didn't catch this huge blunder, it would have cooked in the oven while it was baking. Maybe? Not really sure, though raw chicken is one monster I do not like to mess around with. Easily fixed (semi)-disaster. I scooped out the chicken from the mixture and plopped it in another pan to cook it up real fast. After that was finished, it was pretty much smooth sailing.

This was a pretty good meal. The crust was not one that I would imagine a pot pie to have. Texturally, I would have preferred a more flaky crust. The herbs used made it delicious, I opted to go with basil.

I probably wouldn't jump to make this again right away, but I think it could be a great idea to use leftover chicken and vegetables. It seems to be a pretty easy recipe to cut in half. Also, I think you could run with it as a guideline for some other variations. I thought maybe using cream of mushroom soup with beef cubes and chopped up pepper, onions, and carrots? Or switching out for cream of cheddar soup for a bit of a different taste with the chicken. Get creative. Let your mind wander. Experiment. You won't know if you like it, until you try!

Wednesday, November 16, 2011

Pressured Sausage


This post is coming a little late. This was actually my dinner Sunday night, I never got around to posting it, because Soph and I decided to have a slumber party in the living room; complete with lots of blankets, a movie, and popcorn. Sometimes there are more important things than playing on the computer!

This was a throw together recipe that turned out delicious. I started with a pound of mild sausage cut into 2-3 inch pieces with a few fork holes pierced in the skin. Then I added a can of diced tomatoes, a can of potatoes, half a sliced onion, a chopped green pepper, and a little bit of chicken broth. I would not have added the chicken broth, except my pressure cooker book advises to cover sausage completely with liquid to cook. Next time I will try it without the chicken broth, just to see if it really needs the added liquid. I feel the liquid in the tomato can could be enough. I cooked the sausage on high in my pressure cooker for 10 minutes. After performing a quick release, I added some frozen spinach and cooked on high again for 2 minutes, then performed another quick release. Super simple and super delicious! Next time I may add more peppers, onions, and tomatoes.

Garnished with some Parmesan cheese on Sunday, this made a great meal. I served it again tonight alongside some leftover stuffed shells for one of the most fabulous leftover meals I have ever had!

Tuesday, November 15, 2011

Garlic Bread


This garlic bread was super simple to make and paired nicely with the Stuffed Shells. I bought a loaf of Italian bread and sliced off 5 pieces. Then put a layer of margarine on each piece and sprinkled them with Italian seasonings. I placed them on an oiled baking sheet. I sliced four garlic cloves in half, put them to the side on the baking sheet, and sprayed them with some extra oil . During the last 10 minutes that the shells were cooking, I popped the bread in the oven. Once they were crisp and the garlic was soft, I mashed the garlic cloves down with a fork and spread the pulp onto the bread. Very tasty and it took pretty much the same amount of time to make as packaged Garlic Texas Toast would.

Stuffed Shells


This recipe was the first recipe I ever fell in love with. After the first time I made it, I was hooked. Full of gooey cheesy goodness and lots of yummy sauce, what's not to love. I have made them to celebrate a best friend bringing home her baby, a pot luck dinner with girlfriends, and as a special treat to someone I was dating. For the longest time I refused to give out the recipe for my shells. I will share my secret with you though, as long as you promise not to tell! I found the recipe on the back of the box of jumbo shells!! Take advantage of free recipes given with any product you buy. The objective of the company is to highlight how great their product is, so for the most part, they will not steer you wrong with a crappy recipe. They want you to enjoy the product and use it more often, so they are providing you with a recipe to do so. Take advantage! You may just fall in love, like I did! If not, oh well. That is part of the fun of cooking; finding out what you like and reinventing recipes to make it your own! I did reinvent this recipe a tiny bit. The original recipe called for 3/4 cup of Parmesan cheese. I felt the flavor of the Parmesan cheese overpowered the creamy flavors of the ricotta and mozzarella, so I cut it down to half a cup.

  • 1 Box Jumbo Shells
  • 4 cups ricotta cheese (I used my homemade cheese, yum!)
  • 2 cups mozzarella cheese, shredded
  • 1/2 cup Parmesan cheese
  • 2 eggs
  • 1 Tbsp parsley
  • 3/4 tsp oregano
  • 1/2 tsp salt
  • 1/4 tsp black pepper
  • 3 cups sauce
Heat oven to 350. Cook pasta according to package directions. Combine cheeses, eggs, parsley, oregano, salt, and pepper. Spread some sauce in the bottom of a 13x9 baking dish. Fill each shell with 2 Tbsp of the cheese mixture. Layer shells in dish and cover with sauce. If there are any remaining shells, place them on top of the first layer of shells and cover with sauce. Sprinkle with additional Parmesan and mozzarella cheeses if desired. Cover with foil and bake for 35 minutes. At 30 minutes, remove foil and continue baking the additional 5 minutes.


I would suggest cooking the pasta ahead of time. Once they are drained, they will still be too hot to handle and they have a tendency to hold little tiny puddles of super hot water. I like to drain them and rinse with cold water to stop the cooking. Then I separate any shells that are folded together and let them sit, to cool and dry out a little. The cheese mixture can also be prepared ahead. You can even stuff the shells ahead of time and refrigerate. When you are ready to cook, just add the sauce. If you are interested in freezing them, add the sauce before you freeze. They will hold up for 2 months in the freezer and you can pop them in the oven frozen. They will take about 2 hours to cook as opposed to the 35 minutes.

I never measure out 3 cups of sauce. I just use a jar of sauce and make a layer to cover the bottom of the pan and then sprinkle the top with as much sauce as I desire. I love sauce, so I usually wind up using the whole jar. I also don't measure out 2 Tbsp of the cheese mixture to stuff each shell. I use my hands and just start filling, it gets to be a messy process. I think I stuff them with more than 2 Tbsp, because I always run out of cheese before I run out of shells.

As I said up top, I have made these to treat a special someone! I was rewarded with a dozen red roses and 2 large bottles of red wine; Zinfandel and Chianti. Red Zinfandel is my absolute favorite (not to be confused with its cheap sister, White Zinfandel. You know, the pink crap). Now I am just bragging, but sometimes it is nice to have something to brag about....Look how pretty!

Monday, November 14, 2011

Meatless Monday

http://youtu.be/Jv8u9VOgkiQ

http://youtu.be/KnZL67046YM
I found some cute little videos that explain the benefits and encourages you to join in on the Meatless Monday movement. I can't figure out how to get these to come up with the video, just the links. Check it out if you like!

Ricotta Cheese


Ricotta cheese is also something that never crossed my mind about making. Cheese isn't something you make at home. Or is it? I found this recipe in the food section of the paper and decided it was something I would like to try. Something to have under my food prep belt. I made cheese. It was pretty simple to do, though kind of time consuming. It wasn't a lot of hands on work, but it did take close to three hours to finish. The recipe I have made 2 cups of cheese, but the recipe I am using tonight calls for 4 cups, so I doubled it. The recipe I am sharing is the original and will yield 2 cups. If you want to make this for a specific recipe, I'd suggest doing the cheese the night before. It takes a while to drain and will stay fresh for a day in the fridge.

  • 1/2 gallon whole milk
  • 1 cup heavy cream
  • 1 tsp salt
  • 1/4 cup fresh lemon juice
Combine milk, cream, and salt in a large saucepan. Heat over medium heat and bring to a boil. Remove from heat once it is boiling and stir in lemon juice. Let sit without stirring for 5 minutes. Set a colander lined with cheese cloth over a large bowl. Pour into colander and let drain. If you want a softer and spreadable cheese, drain for one hour. If you are looking for a thicker cheese to cook with, drain for two hours.


This cheese is very delicious. No worries over where it was created, how clean a factory is, or how long it actually sat at the store before you bought it. You may want to compare costs if that is an issue for you. To make 4 cups, this cost me over $8.

The cream and milk mixture seemed to take forever to boil. It has to be cooked on medium heat to prevent burning the milk on the bottom of the pot. I did burn it a little and had to pull some dark pieces out of the cheese while it was draining. It did not affect the taste of the cheese, but was a bit of a pain.

The lemon serves to curdle the cream and milk mixture. Pouring my pot out and watching it plop into the colander was a bit discouraging. It definitely did not seem appetizing. I promise, the cheese tastes very creamy and smooth. Very delicious! This morning I spread some on a piece of Italian bread to go with my breakfast of eggs and tomatoes. Tonight I will use the cheese in a recipe for my favorite stuffed shells. Happy Meatless Monday!!!

Thursday, November 10, 2011

Chicken Broth


The chicken carcass from Sunday was finally put to good use. I made chicken broth in my crock pot. I cannot see why anyone would ever go buy canned broth from the store. It took very little prep work, mostly using things I already had saved, and cooked while I slept. The only inconvenience was that I had to get up a little earlier than normal to drain the chicken and veggies from the broth. If you set it up before work, it would be finished when you come home.

I loaded up my crock pot to almost the top with the carcass, some leftover chicken, carrots, apple cores, celery (scraps and stalks), pepper cores, onion skins, potatoes, greens from leeks, radishes, some garlic cloves, and about 2 Tbsp red wine vinegar. Basically anything natural and healthy that you need to put to use. I even poured in a cup of vegetable broth I had thawed from when I made the braised mushrooms.  I also sprinkled in some Italian seasoning and added 3 bay leaves. Next time I probably won,t do the seasonings, just because they were really hard to skim out. I read that vinegar helped to pull minerals and nutrients out of the chicken bones and veggies. Most recipes recommended apple cider vinegar, but any type can work. You can add salt if you like. I figure most recipes I will use the chicken broth in will be loaded with other flavors, so I decided it was not needed. I covered the ingredients with cold water and let it sit for an hour. This allows the vinegar to seep in and do its magic. If you don't have an hour to spare, then it is not a big deal. Set the crock pot to low and let it cook. My broth cooked for about 12 hours. You can cook it on low anywhere from 8 to 18 hours.

Once you have enjoyed not slaving over the stove and your broth is done brewing, you will have to separate the broth from the veggies. When filled to the top, my crock pot is way too heavy for me to pour directly into the strainer. First I used a large spoon with holes in it to pull most of the large veggie pieces out. The I put a fine holed colander over a large pot and poured the broth through it. I sent the broth through the colander a few times to pull out most of the bits and pieces. Like I said, I was unable to get all of the Italian seasoning bits out. That's OK though, it will just add more flavor to whatever I cook with it.

My next step will be deciding what I want to cook using my first batch of homemade chicken broth.

Tuesday, November 8, 2011

Baby Food: Pears


Today I started a project that is very dear to my heart. My sister asked me for help in making her youngest son, Christopher, some baby food. She just started him with apples from a jar last night. When she told me the next food she wants to try is pears, I ran right out to get my supplies. Pears, ice cube trays, and large Ziploc freezer bags. The idea is to provide him with a more natural meal while saving some pennys. I have not calculated the costs yet, but 4 pears made almost 12 servings.

Fruits and vegetables can be baked, boiled, or steamed to make puree for baby food. Through my research I found the best method to keep all the nutrients in the food is to bake or steam. I usually steam my veggies by microwaving them, but Id rather not do that with my little nugget's food, so I decided to bake them.

 I sliced each pear in half and put them in a baking dish with 4 Tbsp water. Basically the same method I used when making Pumpkin Puree. The pears were baked in an oven, which was heated to 300, for an hour. You should be able to slice through the pear with no resistance when they are ready. After I took the pears out of the oven, I let them cool. Once they were cooled enough to handle, I sliced out the core, then cut each half into quarters. I was then able to use a spoon to remove the flesh from the skin. I put all of the flesh into my blender and liquefied it. My blender is such crap, I cannot wait until Christmas! Santa promised to bring me a new blender. Every time I turned it on, pears sprayed out the bottom of the pitcher. Both my arms and counter were both covered in fruit.

After the pears became puree, I poured it into an ice cube tray and put the tray in a Ziploc bag. It was a tight squeeze getting it into the bag, but I managed. The tray will be frozen and my sister will be able to pop out a single portion when she is ready to feed Christopher his pears.

Monday, November 7, 2011

Angel Hair with Braised Mushrooms


This recipe is a prime example of why you should never let fancy names scare you away from some fabulous recipes. Braised. What the hell does that mean? Honestly, I didn't know until I sat down to write this blog AFTER I cooked and devoured the meal. Braising is a cooking process, usually done with meat, where the food is quickly seared at a high heat and then covered and cooked with liquid at a lower heat. This technique is used often with tougher pieces of meat as it is efficient in breaking down collagen, which can make a piece tough. This collagen is converted into a gelatin or juice, which then combines with whatever liquid you have added to create a gravy or sauce. If you have ever done a roast by browning the edges in a pan before you put it in a crock pot along with some water or red wine, then you have mastered the art of braising.

  • 1 1/2 lbs mixed fresh mushrooms, sliced
  • 3 Tbsp olive oil
  • 3 cloves garlic
  • 1 Tbsp fresh thyme or 1 tsp dried thyme
  • 1 cup white wine, chicken broth, or vegetable broth (your choice, pick one)
  • 1 tsp coarse salt
  • Angel hair pasta
  • 2 Tbsp butter
  • 2 Tbsp parsley
  • Parmesan cheese to garnish
Boil water and cook pasta.
Heat oil in a large saucepan over medium heat. Add garlic, mushrooms, and thyme. Toss until garlic begins to soften. Add wine (or broth) and salt. Cover and simmer for 7 minutes. Drain pasta and return to warm pan. Stir in butter and parsley. Top with mushrooms and drizzle some cooking liquid over the pasta. Garnish with Parmesan cheese if desired.


This was very tasty and pretty light. Sophia was hesitant to try it, but she did wind up eating some. She did not like the mushrooms. They are one of my favorite veggies!!! I didn't learn to like them until I was about 19, so maybe there is some hope for her.


For those who follow along: I made apple pancakes this morning, using my homemade applesauce. They were so delicious! I followed the directions on a box of pancake mix and then added two spoonfuls of the applesauce to the mix. Then, I cooked them just like I normally would plain pancakes. Both Sophia and I highly enjoyed them!

Sunday, November 6, 2011

Green Beans with Tomatoes


YUM YUM YUM!!

  • 1 package frozen green beans
  • 1/4 cup olive oil
  • 1 can diced tomatoes
  • 1 clove garlic, minced
  • 1 tsp oregano
  • 1tsp basil
  • 1 Tbsp parsley
  • 2 Tbsp Parmesan cheese (optional)
Put green beans in a saucepan and cover with water. Bring to a boil and let boil for 3 minutes. Drain. Heat oil in a skillet, add beans, and toss. Add tomatoes, garlic, basil, oregano, and parsley. Cook 5 to 10 minutes. Top with cheese if desired.

This could probably be my most favorite dishes on this blog to date. It was so simple to do and tastes out of this world!! Usually I simply steam my veggies and eat them as is. Preparing them this way only took a few more minutes than steaming in the microwave.

I didn't measure out the oil, I just sprinkled some in a skillet. I also did not use the cheese. I don't think it needed any extra flavor and felt no cheese would be better for my figure. I did measure all the spices, but instead of measuring them as I was adding them to the skillet; I used my time wisely. While waiting for the beans to boil, I measured out all my spices and put them together in a mug. When it was time to add them, I only had to dump the mug into the skillet, instead of rushing to play with measuring spoons and worrying the beans will over cook.

Tomorrow I plan to make a braised mushroom sauce to serve with pasta. I am tempted to cut up these green beans to add to it. I don't know if I want to enjoy them alone as a leftover or use them in another recipe. We will see what my tummy decides it wants tomorrow!

Crock Pot Whole Chicken


I enjoy making a nice homemade dinner on Sundays. I like having homemade food most days actually, but Sunday is a great opportunity to make a meal that will last through the week as leftovers. Today was my nephew and godson's 5th birthday, so I was out of the house most of the day celebrating with my family. Quality family time is very important and cooking should never become a chore that impedes on that. By setting my food in the crock pot right before I went to the birthday party, I was able to have my whole chicken cooking for me while enjoying time out of the house.

When cooking a whole chicken, never forget to remove the pieces from the chicken cavity. I discarded these pieces, but now I regret it. I think I should have saved them to help make chicken broth later this week. Once I removed the neck (and whatever else was stuffed in there), I rinsed out the cavity and shoved an orange up there. I rolled the orange to release the juices, cut it in half, then stuffed it in the chicken. I put a layer of veggies at the bottom of the crock pot. I used one onion, some baby carrots, and one green pepper. Now the scraps from the onion and the core of the green pepper was added to my bag of frozen veggie scraps to use for broth.

I sat the chicken on top of the layer of veggies, then I sprinkled some seasonings over top. I used salt, pepper, rosemary, and Italian seasonings. I set the crock pot on low and went on my merry way to my nephew's party. I let this chicken cook for about 6 hours. To test if the chicken is done, stab it with a knife in the thigh area. If the juices run clear, it is done!

This was so simple and will provide at least two meals plus I will make some chicken broth. After pulling most of the chicken from the bones and saving it for another meal later in the week, I put the carcass in a Ziploc bag. This will be used later this week, along with some veggies from my frozen scrap bag, to make chicken broth.

I served this chicken tonight with the veggies it cooked with, my homemade applesauce, and green beans with tomatoes (recipe to follow soon).

Applesauce


Applesauce is something I have never even thought about making. It comes in a jar. The label says healthy. It is made of apples. It must be healthy, right? Wrong. OK, it may be a healthier choice for a snack compared to fruit snacks, chips, or cookies. Look at the label. Better yet, look at the ingredients. High fructose corn syrup? Words you cant pronounce with way to many consonants? First ingredient say sugar? Why do they need to add all that crap to something that is naturally sweet and delicious?? Because they need it to be able to sit in storage or on shelves for months at a time without going bad. Sure, being able to sit out without being refrigerated can be convenient for lunch boxes, but think of what you are putting into your body. How long will those preservatives sit in your body? The ingredients in the sauce that makes it last will also last a very long time contaminating your body. I am not one of those health food nuts that regulates every thing that goes into our mouths, but if given the choice (and I can afford it) I will try my best to eat as natural and organic as possible. This recipe can be stored in the fridge for up to 2 weeks. Tis the apple season! Finding many varieties of apples locally grown is so simple right now, take advantage!

  • 12 apples. Red was specified in the recipe, but I say use what you like, have on hand, or can get on sale. An apple is an apple. I prefer the red varieties with green mixed in.
  • 2 tsp water
  • 2 tsp cinnamon*
  • pinch of nutmeg*
*optional

Wash, peel, and core the apples. Cut into quarter chunks and put into Crock Pot. Add water. Cook on low for 4 hours. Mix and mash. Add cinnamon and nutmeg when finished cooking, while it is still in crock pot. Stir. Cool completely before serving (though I had a taste while warm, very delicious).

The original recipe said quarter chunks, but I think it may have meant quarter inch chunks. I had to mash the apples with a potato smasher, even though it did not instruct to do so in the original recipe. I am not sure how the apples would hold up if they are quarter inch chunks. I may try that next time I make this to see if it could eliminate the need to mash.

I added some of the apple cores to my bag of veggie scraps I have in the freezer. I thought it might add fun flavor to some vegetable broth.

This recipe was so simple to make! I love that it doesn't even require ANY sort of sugar. Be creative when using applesauce. It does not have to be a simple snack all alone in a bowl. Marinate and bake some pork chops in it, serve it along side chicken, top oatmeal with it, or anything else you can think of.

Saturday, November 5, 2011

Candy Puffs


A friend of mine found this recipe and forwarded it to me when she found out I was looking for something to do with the overabundance of Halloween candy in my house. This did fatten the candy up even more, but luckily my nephew's birthday is just a week after Halloween so I decided to make this treat to bring to his party. I used mainly the candy I don't like from her bag of treats. That strategy keeps me from eating too many of these candy puffs. My puffs consisted of Kit-Kats, Milky Ways, Twix, and Crackle bars.

  • 2 premade pastry sheets (you can find these in a tube, near the dinner biscuit rolls at the food store)
  • 48 bite sized candy bars
  • 2 oz chocolate candy melts or chips
Preheat oven to 400. Roll out the pastry sheets onto a floured surface. Roll into a 10 inch square. Cut into 2x2 inch squares. Place candy in center and fold corners over. Press to seal. Place on a lightly greased cookie sheet. Bake 10 minutes. Cool on cookie sheet for 5 minutes then cool on rack. Melt chocolate and drizzle over puffs.


This was a great recipe to get Sophia involved in. She loves to help in the kitchen. At first I thought she would be upset we were using her Halloween candy, but it really didn't bother her at all. Having a still half full bowl of candy on the counter as we were preparing them probably helped. First I had her open all of the candy pieces I had set aside. I cut any 'fun sized' pieces in half to make them 'bite sized'. I may suggest opening and cutting each piece as you are wrapping them in the pastry, because we wound up with more candy opened than we actually needed. I let Sophia snack on these extras as the puffs were baking. I spread out the pastry sheets and cut them into 2 inch squares, then let her wrap up the candy pieces. Next year I think I will look into how to make the pastry myself. When they were ready to bake, I put the oven light on so she could watch them get bigger.

I thought I would be clever and resourceful by using the plain Hershey bars she received instead of chocolate melts or chips. Why go buy it when I have something similar at home already? This did not work out as planned. Apparently the Hersey bars don't melt down as nicely as the melts or chips would have. It was completely undrizzleable. So, unfortunately I had to scrap that part of the recipe. I am pretty disappointed, because I think the drizzled chocolate would  have made them look more appetizing. If I had known the chocolate bars wouldn't work, I would have maybe pressed some sprinkles into the dough before being baked to make them more festive.

I hope everyone at the party tomorrow likes them! I always get so nervous when people try my food, especially when I use a new recipe!


Thursday, November 3, 2011

Souped Up Chicken


So, I had leftover Curried Apple-Potato soup from Monday. It had a decent taste, but I just wasn't into it. I never want to waste, so I decided to use it as something other than soup. I marinated tonight's chicken in the leftover soup overnight. Actually, I plopped the frozen chicken in the soup and let it thaw out there. This morning I separated the chicken so it would evenly marinate. I do this a lot when I want to marinate chicken that is frozen. Instead of waiting for it to thaw, adding marinade, and then waiting for the marinade to do its magic; I figure the thawing and marinading can be done together. Why not?

I had half a tomato in my fridge, so I sliced it and put it, along with some cheese, on top of the chicken. I baked the chicken alone for about 20 minutes and then added the tomato and some cheese for a few minutes at the end. I wanted the tomato to keep its shape and not get too cooked. I used sharp cheddar, only because that was what I had in my fridge. Even though usually I love sharp cheese, it may have been too strong a flavor to pair with the soup. Maybe I should have used a more subtle cheese. Even slices of American could have worked. I love the creamy taste of melted American cheese.

I served the chicken with corn and some low calorie chicken fried rice, provided by my friend Stephanie. I have the recipe and I hope to someday share it on here once I make it!

As I have mentioned before, Sophia is a horrible eater. She takes forever!! I swear she eats like a slow poke in hopes that I give up waiting and tell her she is permitted to stop eating. That is not me. She has to eat her meals. The rule has always been if she didn't eat enough of her dinner, then she would not be allowed to have snacks for the rest of the night (or until the next meal if we are having breakfast or lunch). This rule sometimes works, except I still have to wait forever for her to finish. Her meal is always served before mine; then I eat, finish, and do the dishes. Sometimes I still have to wait 45 minutes for her to finish eating AFTER I finish the dishes. Let me tell you, I am not a fan of doing dishes, so there is no way I want to go back to doing them just because she wants to take forever! Tonight I made up a new rule. She has until I am done doing the dishes to finish eating. When I am done, her plate gets taken away. If she had not finished yet, it still gets taken, and no snacks are allowed either. I hope this cuts down on the playing around and getting up from the table. It may sound strict, but it is very important to me that my child eats good food that is real BEFORE any snacks are allowed.

Got That Right, Mr. Turkey!!!

Wednesday, November 2, 2011

Spaghetti with Lentil Sauce


Am I throwing you off with an actual full recipe on a Wednesday? Isn't it leftover night?? Of course it is! I had some Lentil Sauce frozen from my very first Meatless Monday. I promised to share the recipe once I got around to using some of the sauce I had in my freezer. The recipe yields a lot of sauce! I was able to freeze two batches after feeding Sophia, my stepfather, and myself. Add in the fact that lentils are so very filling and you have plenty of servings.

  • 2 cups lentils
  • 30 oz tomatoes, canned or fresh
  • 1 1/2 cups tomato paste
  • 2 1/2 cups water
  • 2 tsp salt
  • 5 tsp dry oregano
  • 1/2 tsp black pepper
  • 1/8 tsp dried basil
  • 1/8 tsp red  pepper or cayenne
  • 1/3 cup olive oil
Clean lentils and put in a sauce pan covered with water a 1/2 inch above the lentils. Bring to a boil and then reduce heat to low. Simmer covered and cook for an hour until lentils are tender.
While the lentils are cooking start the sauce.
Combine tomatoes, tomato paste and water in a large saucepan. Start cooking on medium heat. Add salt, oregano, pepper, garlic, and oil when it starts to bubble. Stir and reduce heat to low. Simmer for an hour, stirring occasionally.
When lentils are cooked, combine with tomato base. Serve over spaghetti or brown rice.


I actually used the cayenne this time. I was so scared that it would be too spicy, but it really didn't seem to add much of a taste. Such a small amount with such a large amount of sauce couldn't have done much.
I used a large can of plum tomatoes. Plum tomatoes were a bad choice. As it was cooking, I had to cut up each tomato. Next time I make this recipe, I will plan to use fresh diced tomatoes. 30oz is just under four cups. I may just round it up to four cups, whats two extra ounces going to hurt? Plus I seriously LOVE tomatoes. They are my absolute favorite food. The only version of tomato I dislike is a sun-dried tomato.

The only complaint I have is the sauce is very thick. Not that I am a fan of watery sauce, but I do like my pasta to have some coating. I had to use more of this sauce than I normally would to keep the pasta from tasting dry. Maybe a bit of vegetable broth would have done the trick? Or a can of diced tomatoes, undrained?

This is one of my favorite Meatless Monday meals I have made yet. The first time I made it, my stepfather surprised me with a visit so I fed him dinner. I was a bit nervous to hear his reaction. It was my first attempt at a vegetarian meal and he can be quite the food critic at times. I was pleasantly surprised when he he liked it, even more so when he told me how the meal reminded him of something his mother would make when he was a child. He told me how lentils and other beans used to be used often to fill bellies with protein, when a family did not have enough money to always put meat on the table. When Sophia was a bit timid to eat the circle things in her sauce, he then told her the story of Jack and the Beanstalk. She actually ate her entire dinner that night, which is a big deal for my child. Even tonight, when we had this dinner without my stepfather, she reminded me that we were eating this meal when Poppy told her the Jack and the Beanstalk story.

I highly recommend trying this meal, not only for Meatless Monday. Today is Wednesday and I did not need meat in my dinner. The lentils are so filling that they are able to cut portion size. It does take a bit of a while to cook, but it is not very hands on. Set it up on the stove and stir a few times. Just be sure the kiddies stay away from the stove!