Monday, January 14, 2013

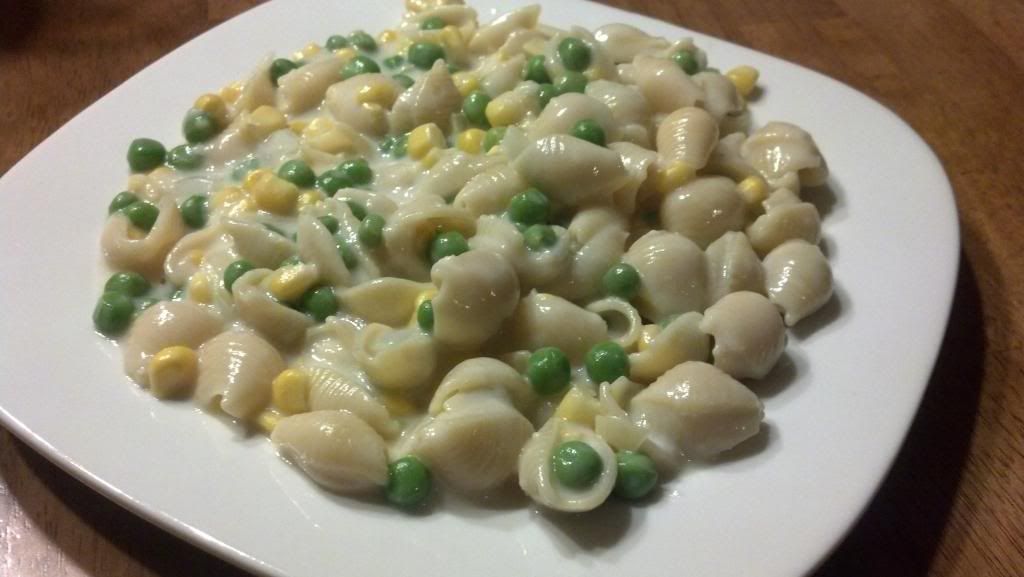
Creamy Pasta


I found the recipe for this sauce attached to a casserole dish. The casserole was not something I would rush to make again, however the sauce seemed to be good to keep on hand. Simplicity is what staples are made of. Especially since this is made of ingredients that almost anyone would have on hand at all times.

This recipe is enough to pair with a half pound of pasta.

Sauce:
  • 1/2 cup butter
  • 1/2 onion, diced
  • 2 cups milk
  • 1/2 cup flour
Melt the butter and saute onions. Once onions are soft, add milk. Stir in flour slowly. Bring to a boil, then remove from heat.

Tossed together with some cooked pasta and any variety of veggies, this is a great weeknight dinner. I managed to make the sauce within the time it took to make the pasta. The corn and peas you see were frozen and added to the sauce right before the milk. Sophia loved this, however I did find it to be a bit bland. Next time I will play around with it some by adding garlic or herbs.

Monday, January 7, 2013

Meal Planning


I am pretty much addicted to facebook. As a single mom, I would not be able to keep up with most of my friends without it. Also, since I do not have cable, it also tends to serve as my news source. Don't worry. I do research any topics that I have interest in before deeming it credible. Another reason I love facebook: it allows me to filter out much of the main stream interest groups so I can focus on my own green-foodie-frugal sentiments. One of the granola paged that I "like", Whole New Mom occasionally posts free e-books, which cater to the lifestyle I try to live. Two of my favorite scores from her page were a guide to raised bed gardening and a guide to meal planning. Hopefully, I will be successful with a garden when the weather gets warmer. I will tell you all about it then, but right now meal planning has been the latest experiment in my home. Meal planning seemed to fit right in with my green-foodie-frugal ways. It eliminates food waste, while keeping me creative in the kitchen and finding ways to make all items count before I buy more. For the most part, my meals have been planned out for the past two months and I don't think I will ever go back to spending my days at work trying to put together that night's meal.

Having a meal plan takes so much stress off your day. I don't know about you, but I am a planner, always have been. I like having a schedule and knowing what is going to happen next. As much as I'd love to be a spontaneous, fly off the seat of my pants kind of gal, I'm not. If I have a plan, that means I have one less thing to think about. It is only natural that I would stumble upon planning out my meals.

Having a meal plan also takes stress off your wallet. By actively thinking about what is already in your home, you create less of a need for more stuff. No longer will you have to wander around a supermarket grabbing staples that you bring home and try to piece together into something appetizing. By meal planning, you create the puzzle at home and only need to go out and pick up the remaining pieces, if there are any. The first time I tried meal planning, I was sold when my grocery bill was only $28! Especially since I hadn't been shopping in over two weeks!

There are many ways to plan out your meal. The free guide I downloaded listed at least four methods: weekly, biweekly, monthly, and seasonal. My meal plans have mainly been on a weekly basis. Once I managed to do biweekly, because I was trying to make it through to my next CSA pick-up. It was pretty awesome having that much planned and out of the way. Right now, a biweekly schedule would work best for me because my winter CSA pick ups are every other week. Once the weather gets warmer, I will have to cut it back down to weekly since I wont be knowing what my fridge looks like until a day or two before the pick up.Weekly and biweekly plans can be run basically the same way. It all depends how often you want to go shopping.

It pretty much boils down to doing inventory and putting the pieces together. The whole process can take up to an hour. I started a simple binder filled with loose leaf paper and I work with two pages open in front of me. On the left page, I make three columns: Cabinets, fresh/fridge, freezer. Then, I list everything. EVERYTHING. The most emphasis will go towards what you have in your fresh/fridge column. The idea is to use up anything that may go bad first. When making my inventory list, I like to put stars next to the most perishable items. That way I can plan accordingly to eliminate waste.

Next I sit down and create a calendar with the right page. Usually three lines per day, so I can name the meal, list out what on hand ingredients I will use, and then list the ones I need. As the calendar comes together, I will also write down tasks for each day. This usually consists of prep work that can be done the night before, such as taking meat out of the freezer to thaw or chopping veggies.

Some meals come to mind almost instantly. Others not so much. Sometimes it helps to put themes into effect. I don't do this everyday, but it does help when you get stuck. Mondays are obviously meatless. Tuesdays are usually always crock pot dishes, because we need to be changed and fed within an hour to get Sophia to dance on time. Wednesdays will be a larger meal because it is a night home. Thursdays tends to be a leftovers day or I will cook a second meal on Wednesday to have Thursday, since Sophia has another night of dance and we go directly after school. Friday, Saturday, and Sunday are always free days. I plan them out, but there is no rhyme or reason. I just follow where my ingredients lead.

Another useful tool is Google. I've said it before, Google is my favorite cookbook! You may have some odd and end ingredients that you have no idea what to do with...Google them together! A search of "steak beans mustard" may actually surprise you. I just came up with that combination off the top of my head, but I googled it and came up with a recipe for beef with black beans and rice. There are so many dishes out there using what is already in your kitchen if you just take the time to find them! Stop spending your money on things you don't even realize you already have.

After my calendar is all filled out, I create my shopping list of only what is needed for my meals. Maybe once a month I will do a big trip to replenish the staples, such as pasta and beans. It has been working out that my weekly grocery bill, if I even need to go at all, stays under $30. It is really helpful to my budget to be able to stay well under $150 in groceries per month. I suggest you give it a shot. An hour of planning may seem a lot, but time is worth money and you will be saving a lot of that!
Sunday, January 6, 2013

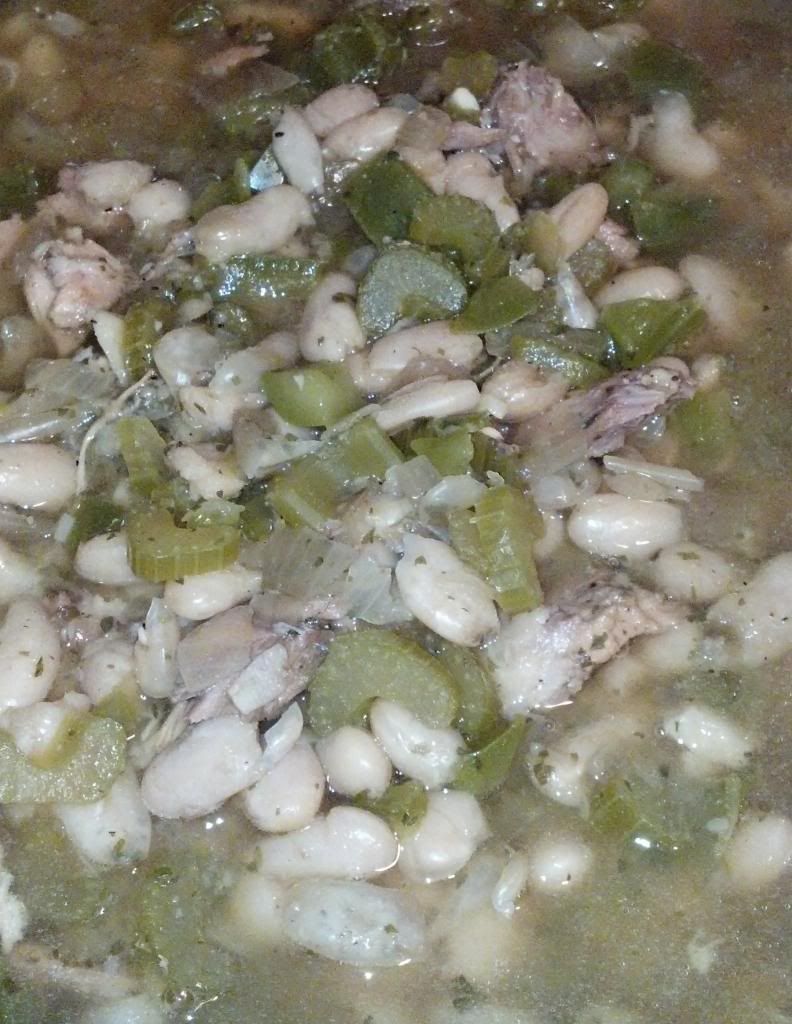
"Monday" Beans and Chicken


This is a recipe that I sat on for a while. I have no idea where I found it, but I really liked the story, so I copied it into my recipe notebook. Then I promptly forgot all about it. So months later....

While I was doing last week's meal plan, I knew I was going to use the local, free range, and organic chicken thighs that I received from my Greensgrow Farm winter CSA. Since this meat was such amazing quality, I had to make sure I used it to its full advantage. Normally I would make stock from chicken bones, but the story of Monday beans and chicken randomly popped into my head. I love when great food ideas strike! Only problem: I could not seem to remember where I found the recipe. I googled it for days to no avail. I could find the story, but no recipe. Finally I remembered that I had written it down in my book. I would seriously lose my head if it...actually, I think sometimes I do.

The name of this recipe derives from an old Southern tradition. On Sunday nights, families would sit down together for a nice dinner of either or ham. Any leftovers, including bones, were thrown into a pot of beans on Monday. This pot would slowly cook on the stove through the day, while the women would spend the day doing laundry. Sometimes this dish is called Laundry Day or Wash Day Beans.

Obviously, I cannot enjoy "Monday" beans and chicken on a Meatless Monday, but I do like it's logic. I think this is a great idea for Sunday dinner. I prepared a quick and easy dinner of roasted chicken thighs on Saturday night and then let this dish cook in the Crock Pot, while I attempted to get a handle on the remaining Christmas mess. Thankfully the dinner was much more successful than my attempts at being productive.

  • 1lb beans, whichever type you chose - soaked overnight
  • 1lb leftover (cooked) chicken or ham with the bones if you still have them
  • 1 bell pepper, chopped
  • 1 onion, chopped
  • 3 celery stalks, chopped
  • 2 Tbsp Parsley
  • 1 Tbsp ground black pepper
  • pinch cayenne pepper
  • 2 cups water
  • 1 Qt Broth
  • 2 bay leaves
Place all ingredients in Crock Pot. Be sure broth and water covers meat and beans. Add more water, if needed. Cook on high for an hour, then set to low and continue to cook for 7 hours. Remove bones and bay leaves. Serve as soup or over rice.

As always, I went a little off recipe. That always seems to happen, according to what I have on hand. Better to use what you have than let it go to waste, just because you went and bought something else. I used a little over half a pound of white beans and I couldn't tell you the exact weight of the meat that was used. It wound up being the meat off two thighs and four thigh bones. Surprisingly, that gave me a decent amount of meat in my final product. This recipe really does lend itself to variety, since you can switch up your beans and types of meat. I will be definitely be trying many different variations in the future. I would recommend only using the larger bones if you are using a chicken, so you can pull them out easily.

Either because I went off recipe with my amount of beans or because this is a southern meal, but this meal is hot! It was way too spicy to even attempt to feed to Sophia. Luckily, I had some odds and ends of leftovers that she could eat for dinner. While it was super spicy, it was not too overpowering for me. So if you don't like it hot, try and cut down on the amount of pepper OR be sure to have a large glass of water and a piece of bread to go alongside your meal.

Saturday, November 24, 2012

Root Soup


This recipe started out as my own idea for how to cook potato soup, until I remembered the abundance of radishes and turnips that I have built up from my CSA. I decided to toss some of those into the mix as well. Especially since they are kind of my problem products. Good thing they keep! The turnips aren't too much of an issue, but I received so many damned radishes this season! I am not entirely complaining, but I really don't have many ideas how to use them up.

 The result was a very hearty blend meant to heat up those seasonable winter nights.

  • 2 carrots, sliced
  • 3 stalks celery, diced
  • 1 onion, diced
  • 5 potatoes, peeled and sliced
  • 2 turnips, peeled and sliced
  • 2 radishes, peeled and sliced
  • 5 cups vegetable broth
  • 1 clove garlic
  • 1 Tbsp olive oil

Heat olive oil in the bottom of a large pot. Add carrots, celery, and onion. Saute until fragrant. Add potatoes, turnips, radishes, garlic, and broth. Bring to a boil, then reduce heat to low and simmer for 30 minutes. Transfer to a blender in batches, CAREFULLY! Season with salt, pepper, and maybe a little paprika.

The color was not the most appealing, but the soup was very satisfying. It was really a very filling soup. Unfortunately I cannot give you Sophia's opinion. She was sick with a stomach virus the day I made this soup. She had intentions of eating, but once I had the soup in front of her the belly started acting up and she was unable to eat. My poor baby only ate half a slice of toast and a few apple slices all day long! That was really hard to watch.

The only gripe I have about this soup is how it holds. It was a nice smooth consistency the day I made it, but it thickened after refrigeration. It was still pretty delicious. Maybe I will need to add some broth or water to the leftovers before heating next time I make this. I will definitely be making this again, since it pretty much uses staples that have constantly been in my fridge this fall. Another great aspect of this meal is every single ingredient was acquired through my CSA! Even the broth was mainly made up of CSA scraps, so I definitely got my monies worth!

Wednesday, November 14, 2012

Pumpkin Orzo


This post is going to be short and sweet. Mainly because I promised a friend I would post it before Thanksgiving so she could make it as a side and I am pretty much getting down to the wire. Can you believe Thanksgiving is a week away?? I have no idea what I will be cooking for the big day. Of course I will be making pumpkin pie, but I don't now what other sides I should offer up to the table. Any ideas?

  • 1 cup Pumpkin Puree
  • 1 can cream of mushroom soup
  • 2 stalks celery, diced
  • 1 green pepper, diced
  • 1 lb orzo, cooked according to package directions
  • 1 tbsp cinnamon
Heat a little bit of oil in a skillet and add the celery and peppers. Saute until soft, then add the soup and pumpkin. Bring to a boil, then turn the heat down low to simmer. Add cinnamon and simmer for 20 minutes to let the flavors blend.
Fold into the orzo.

This dish is best served immediately. The orzo will absorb the sauce if it becomes leftovers. Still delicious, but it looses the desired texture and taste.

Thursday, October 11, 2012

Pressured Beans

I am not a professional photographer. Obviously. Some days I am only lucky enough to get the lighting correct to properly portray the food. Take it as my guarantee that this is real; made and eaten in my own kitchen.

If there is anything that could be able to convince someone to invest in a digital pressure cooker, this is IT! Even after owning mine for almost two years, I still get amazed at the abilities of this little guy. Sure it can create meals, such as soup and meat, in minutes as opposed to hours, but when it can cut out overnight prep work plus hours of cooking - that is something!

During this summer, my interest in using dried beans soared. For about two weeks. I found bags of dried beans on a clearance rack, so I scooped them up. Those bright red price tags sure do catch my eye and get my mind reeling with ideas. At such a low cost, I was sure to find uses for the pinto, black, and white beans I impulse bought. Shortly after, I found a recipe to cook and can pinto beans so they are ready to be mashed and (re)fried Mexican style. Unfortunately, this was a total fail! I wasted 9 pints of beans because most of the liquid escaped from the jars while processing. Being such a dried bean novice, I had no idea how to save my poor little pintos. Not too long after that, there was another horrible bean episode. After hours of soaking and cooking, a whole pot of escarole soup went down the drain. Wasted, because the beans had refused to transform from hard little pebbles to soft buttery beans. Needless to say, I was a bit discouraged from the whole bean adventure. My remaining dried clearance beans spent the rest of the summer hanging out in the cabinet, untouched. Good thing they have a super long shelf life!

This week, I began a new kitchen journey. As I explained in my last post, my life has become so busy, that planning seems to be the only way for my frugal and (somewhat) healthy lifestyle to survive. Sunday, I took inventory of everything that was in my kitchen. The objective is to use up what you have on hand instead of purchasing items you don't really need. With this inventory, you can make up meals using mainly what you already have. A shopping list can be made according to the few ingredients you may need to tie together your upcoming recipes. I managed to only spend $27 at the grocery store this week!

One of the items I needed was black beans. Monday's meal was stuffed sweet potatoes, which calls for a can of beans. I had the choice to go out and buy a can of beans or finally get the courage to make another attempt at the dried beans in the cabinet. Since the main point of this meal planning exercise is to: use up what I already have and to avoid spending extra money; I really could not justify buying some canned black beans.

A bonus of this meal planning is knowing what needs to be prepped ahead of time. By planning Monday's meal on Sunday, I had time to soak the beans and then cook them. The main reason most people use sodium packed canned beans is because it takes too damned long to prep the dried beans. Like most of today's unhealthy lifestyle habits, it boils down to convenience. Enter the Pressure Cooker - Convenience Maker! Once I decided to use the dried beans, I had to google how to properly prep and cook them. Within five minutes, I found a website with instructions for pressure cooking beans. Since one the things hindering me from using dried beans was the amount of time to prepare them, you can imagine how excited I was! I popped right up and grabbed my pressure cooker cookbook, Slow Food Fast. True to its name, this cookbook contained a chart for cooking unsoaked beans within mere minutes! All you have to do is cover the beans with water, add 2 Tbsp oil to prevent foaming, then cook on high for the recommended amount of time according to the specific bean.

Bean cooking time in minutes:
  • Black beans - 20
  • Black-eyed peas - 8
  • Cannellini - 35
  • Garbanzo/chickpeas - 35
  • Great Northern - 25
  • Kidney - 22
  • Lentils, green - 8
  • Lentils, red or yellow - 4
  • Lima - 12
  • Navy - 20
  • Peanuts, raw - 60
  • Pinto - 22
  • Scarlet Runner - 16
  • Soy - 28
  • Split Peas - 6
Just be sure not to fill the pressure cooker more than half full.
One cup of dried beans should make approximately 3 cups of cooked beans.

Twenty minutes as opposed to hours upon hours of cooking is much more do-able. It may take longer than simply opening a can, but it totally makes up for it when you consider the health benefits of lower sodium intake, the significant lower cost, and the reduction in consumer waste - especially if you buy from bulk bins. This is definitely the way to go!

Sunday, October 7, 2012

Kraut


One of these days, I will be able to begin a blog post without feeling guilty and obligated to explain why it has been so long since I last posted. It definitely is not for a lack of cooking. I cook my ass off! It gets to the point that I cannot physically keep up with the amount of dishes that come hand in hand with my delicious hobby, even with a dishwasher! I've been trying to pin down one specific reason for my lack of posts. Truthfully there are a handful of reasons, but if I had to sum it all up: I am TIRED!

I began a new job a few weeks ago. It pays better than my last job, but has me feeling drained. My alarm is set for an hour earlier in the mornings than I am used to, which means I need to get to bed an hour earlier each evening as well. Since I am not a morning person at all and totally a night owl, this basically means I lose an hour in my day. As if I had an hour I could spare! This blog is not the only thing that has suffered due to this job, so don't feel too abandoned. I have not been working out at all! Luckily, by eating fairly healthy, I have managed to stay around the same weight that I reached when I was working out regularly. Unfortunately, it has settled and looks much different. Muscle definitely weighs more than fat!

Sophia started kindergarten this year! Plus, dance classes started the very same week as school. She will be doing two nights of dance this year, which means two nights of being out of the house around dinner time. I really want to avoid the drive thru on those nights as much as possible, which means I need to get into the habit of planning. Now I need to think ahead and make large dinners that will provide leftovers or cook two meals on Mondays and Wednesdays to have a quick heat up meal on dance days. My life looks so different than it did this time last year, when I started this blog. Well, except for the fact that I am completely single. That hasn't changed and doesn't look like it will be anytime soon.

So now that I have caught you up with whats been going on with me (and vented a smidge), it is time for the kraut. With this CSA, I have had more cabbage than I knew what to do with. Not that the farm had an over abundance of a cabbage crop, but I never really cooked with cabbage before so I had some recipe searching to do. Luckily cabbage heads keep well in the refrigerator.

I was interested in making my own sauerkraut, but every recipe I found involved a 5 gallon bucket, a large plate, and months worth of fermentation. It is not unusual to find my house smelling like whatever I've been cooking, but the smell of fermenting kraut sticking around for months could really get old. A new friend of mine shared her recipe for small batches of kraut. Thank goodness! Even if I could handle months of fermentation smells, what would Sophia and I ever do with gallons of kraut?

- 3 to 4 small heads of cabbage or 1 to 2 large heads
-salt

Shred your cabbage. If you are like me, working without one of those fancy Kitchen-Aid do-hickeys, this is a rough process. Watch your knuckles! Once all the cabbage is shredded, begin layering it with the salt in a large bowl. One layer of cabbage, one generous layer of salt. Continue to layer until all cabbage is in the bowl. Let sit for 30 minutes to an hour. The salt will pull moisture out of the cabbage. Once there is a puddle of water collecting at the bottom of your bowl, it is time to transfer to jars. I managed to put all my kraut into one wide mouth mason jar. I recommend a jar with a wide enough opening to fit your hand inside.

Transfer your cabbage and its liquid into your jar, pressing down firmly after every couple scoops. There should be enough liquid to cover the cabbage once the jar is filled. If not, add some water. Shut the jar and place in a dark cabinet for a week to 10 days. Check your jar every few days and rinse any scum that collects on the lid. Be prepared for some fun odors to come rushing out of your jar the first time you open it. Don't say I didn't warn you! The smell was so strong, it chased my sister out of my apartment. Start taste testing your kraut at about 7 days. Once it is to your liking, transfer the jar to the fridge.

Now instead of buying those bags or cans of slop, you have your own kraut to add to pork chops, hot dogs, sausage, or any other dish you see fit. This past week, I baked some with turkey sausage and apple slices. Very delicious!

Friday, September 7, 2012

Preserving Herbs


If you have an at home herb garden, or belong to a CSA like me, you may have an awesome problem on your hands. Recently I have had an overabundance of basil! I came home from the farm last week with half a grocery bag filled with basil, AFTER split it up and gave a grocery bag to my veggie partner that splits the share with me. So much basil!! The smell of fresh basil is just a little bit of heaven in my nose. I want to bathe in the scent (no really, I have been tossing around the idea of homemade soap. How fun would that be??)

Except, after a while you run out of ideas. I have been tossing basil into everything! Omelets, soup, sauce, pesto pasta, pesto pizza, pesto chicken. Pesto Pesto Pesto. More on Pesto later, because Sophia highly enjoys helping me make pesto! But, seriously there is only so much I can do with all this basil right now.

No matter what sort of herb you have an overabundance of, you can easily save some for winter. Using your fresh herbs in the winter will be so much more of a treat than using the dried up flakes you can buy at the market.

  • any amount of herbs
  • an equal amount of water or oil
Using your blender or food processor, combine water and herbs. Blend until leaves are finely diced. Pour mixture into an ice cube tray. When frozen, transfer cubes into a freezer bag.

Drop a cube or two into your favorite soups or crock pot recipe. If frozen with oil, you can place the cubes in a pan to melt before sauteing some veggies.


There is also the option of drying out your herbs. Just tie the leaves together at the stem with some twine and hang on a hook or pin anywhere in the house. I have also done this. It makes for a nice decoration/air freshener. Once they are dry, the leaves can be ground or stored whole in your pantry.

Sunday, August 12, 2012

Tomato Turnip Simple Soup


This may have been one of the easiest soups I have ever made. Simply set the ingredients in the pot, set the kitchen timer for 45 minutes, and go get some things around the house done. I was able catch up on dishes and get a shower within the time my dinner was cooking.

There is only one change I am going to suggest making for this soup. Next time I make it, I will leave the pasta out until the time remaining for the soup is the time that the box suggests to cook the pasta. While the soup is cooking, it winds up being at a constant boil and no pasta ever needs to be cooked much longer than 15 minutes. It did not turn to complete mush, but had a Spaghetti-O consistency. I prefer my pasta to be a bit more al-dente. Once I make this soup again, which I can guarantee I will, I'll try it with the altered pasta cooking time and update this post with results.

  • 2 small turnips, peeled and diced
  • 4 medium tomatoes, cored and diced
  • 1 cup pasta (recipe suggested elbow macaroni, but seriously, use whatever you have on hand)
  • 1 cup tomato sauce
  • 5 cups water
  • 1 tablespoon butter (use olive oil to make the recipe vegan)
  • dash of salt and pepper
Place all ingredients in a large pot. Cover and cook 45 minutes over medium heat.

That's it! Easiest instructions ever! I like this recipe, because it uses two of my CSA veggies while they are in season at the same time. An over abundance of tomatoes is a blessing, but I have been struggling with using all my turnips. Turnips have never been a household vegetable for me, so I have been searching for recipes lately. Do you have any favorites to share?

Monday, July 23, 2012

Summertime Popsicles

Enjoying a strawberry-pineapple popsicle.


Who doesn't like a popsicle? They are awesome summertime treats to help cool off from the hottest days. What I don't like about popsicles are the sugar laden options found in your grocers freezer. I cannot say every single option you can find at the super market is horrible, but most are pretty much crap. They are full of sugars, chemicals, and dyes that are just not needed in your diet. There are some "healthy and all natural" options out there, but be careful with labeling. It is barely a secret that corporations hide lots of true facts in order to market their product as healthy or all natural. Plus the price on the "good" stuff usually sky rockets. I like to spend my limited dollars on essentials that are actually good for us.

As soon as the weather turned hot, Sophia started begging for popsicles. Last year, we had them in our freezer at all times. Within the past year, I have learned a whole heck of a lot about nutrition and all the crap most marketed foods are loaded with. This summer, I have not been able to allow myself to spend my money on these neon colored treats. But popsicles are part of summer!! I cannot deprive my child of such a childhood staple. So we set out to find some popsicle molds and made our own.

I am not going to give a recipe for this, because you can basically throw anything you want into them. Pick whatever fruits (and even some veggies) you have on hand and toss them in the blender. Simple enough! This may be a great opportunity to sneak in some veggies for some picky eaters you may have. So far we have made strawberry-pineapple pops and banana berry-kale pops. You may get turned off at the idea of kale in your popsicle, but the sweetness of the fruit completely masks the flavor and you get all the added benefits of the super food. Just pour the fruit blend into your mold and freeze! If you have any leftover, drink it as a smoothie! Totally delicious and totally healthy!


Adding some kale!

Tuesday, July 17, 2012

Stuffed Zucchini


"This is so good, it 's the goodest thing in the world. That's not right, because you are the goodest thing in the world, Mommy. This is the goodest thing after you."....An exact quote from Sophia after she tried the stuffed zucchini. It doesn't get much better than that, especially since she did not like zucchini the last time I made it and tomatoes are at the top of her Yuck list. Just another example that perseverance is key to avoid a picky palate. She even asked for seconds! I was planning to save the last little zucchini boat for today's lunch, but who am I to deprive my child of more vegetables? 

It seems we are getting into summer squash or zucchini season. Last week, I brought home 1 yellow squash from the farm. This week we were offered 6! Of course, I shared the bounty with my veggie partner so I really came home with 3. One of them was huge, so I immediately grated that to be frozen. We are looking forward to heating up our household in the cooler months by baking either zucchini bread or zucchini muffins. Sophia has her heart set on muffins, so that is what we will most likely make. I will keep you posted in the coming months of our adventures with all the CSA veggies we have preserved through freezing, canning, and drying. Have I mentioned how much I love my CSA at Snipe's Farm?? Seriously, I found my happy place. Visiting the farm to pick up our vegetables is always a major highlight of my week.

We are also definitely getting into tomato season, which excites me tremendously! We went from bringing home one tomato last week to 10 tomatoes plus some pick your own cherry tomatoes. As the weekly amount gets larger, fingers crossed, I hope to learn how to make my own tomato sauce and put it up for the winter. The prospect of not having to buy all that processed crap as well as cutting down on imminent packaging that comes along with it warms my heart. It may be a bit of extra work, but so worth it. Plus, less to spend in the middle of winter on groceries!

My Meatless Monday meal consisted of mainly zucchini and tomatoes. Within the stuffed zucchini, the majority of the ingredients came directly from my farm. I served them alongside fresh picked green beans and some brown rice. This was definitely a fresh, local, and seasonable meal.

  • 2 medium sized zucchinis, ends removed
  • a handful of cherry tomatoes, diced
  • 2 Tbsp olive oil
  • 2 Tbsp Parmesan cheese (or yeast crumbles, if you are vegan)
  • 4 Tbsp Bread crumbs
  • 2 cloves garlic, minced
  • 2 tsp oregano
  • 2 tsp basil
 Bring a large pot of water to a boil. Using tongs, place zucchinis in the water. Boil for 10 minutes, then set aside to cool. Preheat oven to 350. While zucchinis are cooling, heat oil over medium heat in a skillet. Add garlic and cook until fragrant, about 2-3 minutes. Add tomatoes, basil, and oregano to garlic and let simmer. Once zucchini is cool enough to handle, slice in each in half. Use a spoon to scoop seeds and flesh out of the middle, making zucchini boats. Chop flesh and add to the garlic and tomato mixture. Toss in breadcrumbs, mix and let cook on low for a minute or two. Scoop mixture into zucchini boats and place them on a baking sheet. Top with Parmesan cheese and bake for 15 minutes.

Some stuffed zucchini recipes include meat, a lot of them include rice. Rice takes way too long to cook on its own to be an ingredient for a week day meal. I decided to make the rice and the stuffed zucchini at the same time, so I could just serve the zucchini on a bed of rice. Usually, I cook more rice than I need for one night, so I have leftovers to serve with another meal during the week. It's all about saving time and money, while trying to eat as healthy as possible.

Tuesday, July 10, 2012

Crock Pot Mac and Cheese


Lately, my crock pot has not been getting much use. It has had the sole purpose of being my veggie broth brewer. This is mainly because lots of crock pot recipes revolve around meat, which can withstand the long and slow cooking process. While I am not a vegetarian, I have been trying to cut down on my meat consumption. I have not had many veggies from my CSA that would hold up in the crock pot. The only vegetarian dishes I know of for the crock pot are a variety of bean chili's. While I love chili, it is not the season. If you have any ideas for vegetarian crock pot dishes, please comment!! I do not receive nearly enough comments and I really enjoy reading them.

There are loads of pasta crock pot recipes out there, but this is the first time I tried one. Basically, they do not take enough time to be considered a weeknight meal. Does that even make sense? I love the idea of the crock pot, because you can set it before work and have dinner (or broth) completely cooked when you get home. If you tried to do this with pasta, you would come home to a big pot of mush. Most pasta recipes take about 2-3 hours to cook on high. This just seems highly inconvenient, since I can't run home at 4 to set it up for my arrival home at 6 and we would be eating way too late if I had to set it once I was home from work. The only reason I wound up making this was because I had some cheese that needed to be used and i was having  a very lazy Sunday (aka I had a rare Sophia free evening on Saturday, so I was hurting a little from my night out). It also helped that pasta was on sale!

  • 1/2 lb uncooked pasta. Any kind should be fine, but I used shells.
  • 4 cups milk
  • 4 cups cheese. I used 2 cups mozzarella and 2 cups cheddar. Mix and match, or use whatever you have/prefer.
  • 2 eggs, beaten
  • 1 tsp ground mustard
  • 1/2 tsp salt
  • 1/2 tsp pepper
 In a large bowl, whisk together the eggs and milk. Add salt, pepper, and mustard then whisk again. Grease crock pot with cooking spray. Put all ingredients in the crock pot. Fold together, making sure everything is evenly mixed. It will be very liquidy (yes, I make up my own words). Set to high and cook for 90 minutes to 3 hours. Around 90 minutes, you want to start sporadically checking your pasta. Mine took 2 hours to complete. All crock pots cook different and you want a nice al dente texture that will hold up to the cheese.

We loved this crock pot concoction! I think it will definitely be on the menu again for a lazy weekend dinner. The texture is definitely not that of the boxed macaroni and cheese. It has a bit of a gritty texture from the real cheese. This reminded me of the mac and cheese that an ex boyfriends mom used to make in the oven. She would toss some extras in there sometimes, like sausage or mushrooms. Maybe next time Ill jazz it up with some extras. Maybe I'll mix in some fresh broccoli from my CSA. The possibilities are endless, everything tastes delicious smothered in cheese!

Sophia really liked this as well, which is always a total plus! She asked for seconds AND wanted me to pack some for her school lunch. I love when I can send leftovers for her lunch, because finding solutions for a wholesome lunch is a major challenge. Sandwiches everyday seems so boring, but with a school change for kindergarten next year, I believe it is the only option we will have. At least the school she is in now will refrigerate and heat up leftovers that I send. I may have to invest in a good thermos or two.

You may think half a pound of pasta won't be enough for your family, do not be fooled by the numbers! This makes a lot of mac and cheese. Sophia and I both had seconds at dinner on Sunday, we both brought some for lunch on Monday, and there's enough left for me to have it for lunch again today. The pasta seems to swell as it cooks. Especially if you accompany it with some chicken breast and greens, that half pound will go very far!

Monday, July 9, 2012

Colcannon

Not sure what Colcannon would traditionally be served with, but fresh veggies go with anything!!


Colcannon is a traditional Irish meal that would be eaten at the beginning of the spring season. A feast was made on Imbolc, the first day of Spring, which would always include Colcannon. Colcannon has many different recipes, one substituting kale for cabbage and was served at Halloween. In the fall version of the dish, a ring would be hidden in the food to predict who would be married within the year.

There are some today that serve this dish as a celebration of St. Patricks Day, because it represents Ireland with its white and green color. I decided to create this dish simple because it was the most intriguing search result when I googled "cabbage and potato recipes". Added bonus: I could also use green onion, which has been a bit of a challenge in my CSA. Now if only I could find some new uses for radishes!

  • 3-4 medium potatoes, peeled and quartered
  • 3 Tbsp milk
  • 2 cups chopped cabbage
  • 2 Tbsp butter
  • 1/4 cup green onion (regular onion could be used as well)
Cook the potatoes in a pot of boiling water. Remove cooked potatoes with a slatted spoon and set aside. Cook cabbage for 6 minutes in the boiling potato water. Meanwhile, saute the onions in the butter. Mash potatoes with a fork. Stir in onions and cabbage. Add milk, then salt and pepper to taste. Fluff with a fork.

I was pretty excited to make this meal, but it was actually kind of bland. Seasoning it with a little extra butter stirred in and some more salt and pepper which helped a bit. Sophia did not like it too much, but she did eat some without any arguments. The original recipe suggested topping this with some cheese. Maybe next time!

Wednesday, July 4, 2012

Green Tuna Pasta


I will preface this post by announcing that I have never, and I mean NEVER, been a fan of canned tuna in any form except with some mayo and spices and served as a sandwich or with some green peppers to dip. The idea of those tuna helpers or any sort of tuna casserole grossed me out. My mother and sister are even more opposed to tuna than I have ever been, so that is probably where I learned it. I don't think I will ever be able to cross over that warm canned tuna barrier, but this dish is delicious. It is a cold refreshing pasta dish that makes use of green onions, a vegetable that is very abundant in the spring and early summer.

Every week so far, green onions with my CSA. The first week, I didnt know what to do with them so I froze them. The second week, I gave my veggie partner the entire ration, because I still did not know what I should do with them. The third week, my portion of green veggies wilted before I could figure it out. Honestly, the only use I have ever had for green onions was soup. It has been super hot around here these days, so soup was not the best solution. Finally I decided to google some uses of green onion and came up with this simple sauce. There really are no exact measurements here. Go by taste. I used half a lb of pasta so you may want to double up what I have. Remember, I am only feeding me and my mini me. You can make the sauce while your pasta is cooking. This meal can be completed in just about 10 minutes. You gotta love a fresh summer meal that takes almost no time slaving in a hot kitchen.

Sauce:

Make while cooking pasta

  •  a bunch of scallions/green onions, chopped
  • 2 or 3 garlic cloves chopped
  • 1/3 cup pasta water
  • 1 tsp lemon rind
  • juice from one lemon
  • Olive or grapeseed oil
Heat a Tbsp of oil in a pan on medium heat. Add green onions and garlic to the pan and saute for 5 minutes. 
Put onions and garlic into a blender and add the pasta water and lemon. Process until smooth. Add more water or oil, if needed, to reach a desired consistency.

Pasta:

  • 1/2 lb pasta
  • 1 tomato, diced
  • 1 can tuna, drained
Cook pasta according to package directions. Be sure to reserve some cooking water for the green onion sauce. Rinse with cold water. Fold in tuna and tomatoes. Mix in sauce and sprinkle some fresh basil to the top.

As apprehensive as I am about canned tuna, I was kind of excited to try this, since I figured the green onion sauce would mix well with the flavor of the tuna. I was definitely not disappointed. Sophia, however, was a hard sell. She definitely does not like tomatoes, so we had to pick them out, and we are still working on seafood. She likes crab and she likes tuna in sandwiches sometimes, but she definitely does not like shrimp. As always, my policy is to serve her whatever I am eating, no matter how many times she disliked the ingredients in the past. You never know when she will decide to like something! Fortunately when I made this, Sophia had spent some time at my sisters and already had eaten. She was a little hungry, so she sat down with me to eat and gave it a chance. She pretty much pushed aside bits that she did not like and ate all the pasta. I can totally see myself making this again

Tuesday, June 12, 2012

Blueberrry Jam

How can you not fall in love with that color?


Paying $1.99 for a pint of blueberries last week got me pretty excited. Berries tend to be a bit of an expensive treat for my single income household. They were so delicious too! Usually if we do buy blueberries, you get some that are way too tart. This is an added price you pay for purchasing fruit that is not in season. In keeping with my new motivation to eat fresh and local, as well as my new canning adventure, I decided I would make blueberry jam. Especially since it was one of the only jam recipes I have come across that did not need added pectin.


I was told one of our local farms had started harvesting their fresh blueberries. Since I wanted to stick with local fruit, I made the half hour drive to the farm on Sunday morning to get my berries to use in the jam. Unfortunately they did not have any homegrown berries for me, but they did have pints shipped out of New Jersey. I guess that was better than the California berries that are on sale at the supermarket. I was also disappointed in the price. $3.99 a pint!! Not so cheap, but I already my heart set on making jam. The recipe called for 8 cups of blueberries, so I spent almost $16 on blueberries alone. Next time I will try and check some pricing before I decide what I'm making. The whole point of my canning adventure is to have fruits and veggies purchased during their peak (cheap) season last me through the winter. I did get some fresh homegrown strawberries for a low cost that I plan on drying tonight.
 **I went shopping Monday night, before I published this post, and found blueberries for $1.49 a container. Sadly, they were from California so they were not ideal, but I couldn't let that price go to waste! I bought another 4 pints to make another batch tonight.

This recipe is in a two part process. First you need to make the jam, then you need to can it if you do not plan to use it right away. If you are canning your jam, I suggest setting up your canner before you start making the jam. You will need to put your jars in the canner and fill it with water to 2 inches above the jars. Cover (do not lock lid) and bring to a rolling boil.

To make Blueberry Jam:

  • 8 cups blueberries
  • 1 cup sugar*
  • 1/4 cup bottled lemon juice 
 Put all blueberries in a medium sized saucepan. Using a hand potato masher, press the blueberries to release their juices. Slowly bring to a boil, stirring frequently. Stir in sugar, then stir in lemon juice. Continue to boil until jam reaches desired gel (see gel test below), stirring frequently. Remove from heat and let sit for 5 minutes. Stir a few times during this 5 minutes to help any bubbles escape.

*the original recipe I followed called for 2 cups sugar. I was unaware that my sugar supply was low and did not realize until I had already started to cook the berries. With only 1 cup left, I used what I had and hoped for the best! Some of the jam recipes I've read state the correct amount of sugar is necessary for the jam to gel properly. My jam turned out great, so I adjusted the recipe I'll use from now on to 1 cup. Why add the extra cup of sugar if it is not needed?

It was so interesting watching my pot of blueberries turn into jam. The color transformation was amazing. It went from being the typical blue of the berry, to a pink/fuchsia, then to a deep purple. Boiling down to a gel was a bit more time consuming and messy than I had expected. Occasionally the bubbles from the boil would burst and send drops of jam into the air, which landed on my stove, walls, and arms if I was stirring. Luckily my limbs survived, but I am pretty sure some of the droplets of jam stained the paint on my walls. It is not very noticeable, unless you are looking very closely. I am baffled at how to prevent this from happening. Putting a lid on the pot may cause it to not reduce down to a gel. The only idea coming to me at the moment is to take up some sheets of tin foil on the walls surrounding the oven. Maybe next time. Please leave a comment if you have any other ideas that may help!

To Can Using the Boiling Water Method:

The recipe I followed suggested using the boiling water method of preserving. Some of my research said this method is archaic and should not be used. The recipe came out of a book that lists both the boiling water method and pressure cooking method as good systems of preservation, depending on the ingredients canned. Seems to me some foods, such as greens and meats, need specific pounds of pressure to ensure the integrity of the food stays intact. Other foods can be canned using the boiling water method safely. I am a newbie, so I plan on following the directions on specific recipes and hoping for the best! One day I hope to be able to speak with more knowledge on the subject.

  1. Prep your jars. This is what I suggested to do before you started cooking the jam. Your canner will take a long time to boil and you do not want the finished jam sitting around (aka collecting bacteria) waiting for the jars to be ready. Fill the canner with jars. You want as many that will fit in the pot, no matter what your expected yield. They are going to be processed with rolling boiling water and having a filled pot will prevent them from falling over. Fill the jars and pot with water, covering the jars with at least 2 inches of water.
  2. When jam is ready, remove a jar with jar tongs and dump water into a bowl with jar lids. The hot water will prep the lids by softening the seal. Stand jar on a laid out towel on your counter. 
  3. Spoon jam into jar, leaving 1/4" head space. Be sure to remove all bubbles from jam. 
  4. Repeat steps 2 and 3 until you run out of jam. 
  5. Use a damp cloth and wipe the edges of the jars. To ensure a proper seal, nothing can be between the lid and the jar.
  6. Lift a lid out of the hot water bath with a magnetic wand and center it on top of your jar. Repeat  for all jars. 
  7. Fasten rings on jars to finger-tip tight. Basically, when you start to feel resistance, stop. You do not want the rings tight at all. 
  8. Lower jars back into pot and return to a rapid rolling boil. Once the boil is rolling, set a timer for 10 minutes. 
  9. Turn off heat and let jars sit for 5 minutes before moving out of water.
  10. After 5 minutes, remove jars and set on a towel that is laid out on the counter. You will have a little pool of water on top of the lid. Resist the urge to tip jar and pour off. The cans are not sealed yet. Tipping the jars could hinder the sealing process. You will hear the lids make a pop sound. That is the happy sound of your lids sealing.
  11. Let jars cool overnight.
  12. Check seals by gently pressing up on the edge of the lid. A sealed lid will not budge
I think I did a good job pressuring these half-pints. There seemed to be no signs of a faulty seal. One jar did seem to have a few droplets of water on the inside of the lid. Not sure if this is a bad sign or not, but I will definitely be keeping an eye on it. One of my jars wound up being opened the very next morning. I was packing a peanut butter and jelly sandwich, which is my go-to lunch option when I have nothing already cooked up on Monday's, and realized I had no open jelly. Even though I had a jar of store bought grape jelly in the cabinet, I could not resist using the new blueberry jam. It was delicious! Sophia tasted the jam as soon as it was finished cooking and said she didn't like it. I still packed her a peanut butter and jam sandwich for lunch at school and she came home with no complaints. She must not have realized she was trying something new when it was disguised as a typical pb&j.

Gel test:

Stick a plate in the freezer. Drip a small amount of jam onto cold plate and let cool. Using your finger, attempt to push the jam across the plate. If the blob of jam wrinkles, it is ready. If it smears, continue to let it cook.


Friday, June 8, 2012

Adventures in Veggie Land


This year I am on a health kick, or at least I try to be. I definitely have stepped up my game with my eating habits. A girlfriend and I decided to split a CSA share at one of our local farms. CSA=community supported agriculture. Basically you buy a share of the farm as kind of an investment. Each week you can go pick up your share of whatever the land produced that week. You go and they tell you how much of what produce you can take. It is a great way to eat local and fresh goods, while trying some new things that you may not have thought to pick up at the market. Our CSA program started last week and ran through November. We did not split up the share last week, since I was away on vacation. This week is my first week with my pile of veggies. Next week it will be my turn to visit the farm and pick up our load.

When we signed up, the farm provided a list of which foods we could hope for. Spring time yields an abundance of leafy greens:
  • Broccoli
  • Scallions
  • Chard
  • Asian Greens
  • Escarole
  • Lettuce
  • Turnips
  • Radishes
  • Spinach
  • Peas
  • Beets
  • Dill
  • Cilantro
  • Fennel
This week we received: Broccoli, scallions, swiss chard, romaine lettuce, red leaf lettuce, radishes (with greens attached), fresh basil, turnip greens, and swiss chard.

I have a feeling my broth bags will be filling up very rapidly during our time with this CSA. Hopefully I can use as much of these veggies as possible. I definitely don't want to have any go to waste. I don't know have plans yet for my entire veggie load, but I do have some things figured out. For lunch tomorrow; I made a salad with radish greens, romaine lettuce, a sliced radish, and a tomato. I diced up all the scallions and stuck them in the freezer. They will keep for up to 6 months. I found a recipe for swiss chard and mushrooms that I would like to make for Meatless Monday. Having 3 heads of lettuce could be a problem for me, since I am not a huge fan of lettuce based salad. I may need to make lettuce wraps one night for dinner.

***UPDATE 6/8/12 I do not recommended making a salad with radish greens. I read this suggestion on some website. I really wish I could remember the website, because I would leave a comment telling them how horrible the idea is! Radish leaves are pokey, which I did not realize until I had them in my mouth. UGH! Trial and error is a great part of cooking, except when you bring something to work for lunch that is horrible and you have no other food to fill your belly!

This is very exciting for me. Hopefully the CSA works out well for us this year. I love having a fresh stocked kitchen!

Thursday, June 7, 2012

An Introduction to Pressure Canning


As my regular readers (do I have any?) know, I am a huge supporter of homemade broth. It was one of my first proactive steps into being more eco-friendly. I love that it helps save money in multiple ways. By using the parts of the vegetable that is not normally cooked, I squeeze every penny out of my produce purchases. Then whenever I want to make soup, I do not have to pick up store bought (aka processed) broth. I usually always have some on hand. Since I started making my own broth, I have come to make total use of my freezer. Lately, I have been eating much healthier which means my veggie scrap bags were filling up faster than I could make and store broth. The last batch of broth needed to be used up almost completely before I could even think about adding more jars to the collection. My freezer wound up being so packed with jars and veggie scrap bags that I had to buy small bins to organize everything else. Before I put the bins in place, things were falling out every time I opened the door. Pretty soon, investing in a second freezer began sounding like the best next move. Purchasing a new major appliance would have been too much of a burden on my already tight budget. Luckily my mother, offered up the freezer she has kept in her basement since I was a little girl. This seemed to be my solution. With all my new frigid storage space, I could jump into storing more soup, making homemade tomato sauce, make more broth, and who knows what else! All while leaving my kitchen freezer free to use for more daily functions. Great plan!

...Until I thought about the spike this might cause in my electric bill. The spike in the electric bill would be due to a large amount of added energy my household would start using. I make my own broth to be more green. Adding a major appliance seemed to be going backward. Back to the drawing board...

I really don't remember how I stumbled upon the idea of canning. It had nothing to do with storing my broth though. Somehow I managed to get interested and ordered a canning recipe book from Amazon. Funny - I can remember so many tiny little details of my life, but I can't remember how I got interested in my newest culinary adventure. So I bought this book and I have had a nice collection of mason jars for a while now, but I still was not completely sold. The idea of preserving fruits and veggies while they are in season (aka CHEAP) was majorly appealing. The whole process just seemed like a crap load of work though. Plus the risk of botulism seemed pretty scary. I could spend my time, energy, and money canning all this stuff that could make us sick? Oh No! Still, I kept doing my research on the process. Apparently using a boiling water bath is the dangerous method, but pressure canners are more safe. Problem is, pressure canners are a bit costly. The cheapest one I found was $80. For a few weeks, I debated whether it would be worth making the investment. Then, I stumbled upon someones blog post discussing canning homemade broth and I was sold! A one time payment of $80 is much cheaper than the monthly costs of a raised electric bill. The smaller environmental impact is also a huge bonus. Now I sound like an infomercial. 

She is a monster!


The canner is now mine! I have big plans for the summer of canning. "Putting up" all those in season veggies can get me through the the winter months; when the prices of fruits and veggies seem to always skyrocket. I can maximize my consumption of local fresh veggies and minimize my carbon footprint. Buying vegetables in the winter often means they had to be shipped long distances to get to you. They are definately not as fresh as they could be and just think about the amount of fuel it took to get that food to your kitchen. The distance and amount of fuel used to ship food is known as food miles. Focusing on eating local will cut down the food miles needed and also help your local economy. What's not to love? Maybe the extra work that is needed. Ill have to set aside some hours specifically for my canning activities. Last night sure was an adventure while I tried out the canner for the first time! Sometimes it is probably better that I live with just my child. As I make my way through any recipe, I tend to make loud sound effects and talk to myself. Throwing in a large heavy duty piece of kitchen artillery to the mix made for some interesting scenes.

Canning is kind of a long process. Once I get the hang of it, hopefully I will become a bit more efficient than I was last night. The freezing method is much faster. Since I started with broth, I am going to share the directions for canning broth. I have only done this once, so I am not sure if the directions would be the same for any other recipe. Actually, I am pretty sure the amount of pressure length of cooking time needed will vary depending on specific ingredients. I don't know much, but I am learning and I promise to share whatever I learn with you.

Here is the directions I found that convinced me to get started with canning: http://www.culinate.com/mix/dinner_guest/how_to_pressure_can_stock Since this is not a subject I know much about and it seems to be an exact science, I am going to share her directions with you along with my notations and experiences.
**I learned a long time ago to always site your sources. No plagiarism, kids!


  1. Place your stock in a large pot and bring it to a simmer.If you make your stock in the crock pot, like I do, I don't think this step is necessary. I did do this last night, but read that this extra heating process can make the stock cloudy and effect the taste. I think you can drain the veggies from the broth and keep it in the crock pot on either the low or warm setting until you are ready to fill your jars.
  2. Put the necessary number of jars (either pints or quarts) in the pressure canner. Fill the pot with three to four inches of water and put enough water in the jars to keep them from floating. Put the lid on the canner (you don’t need to lock it into place at this point) and bring it to a boil.
  3. Put the canning lids in a small saucepan, cover them with water, and place the pan over very low heat, in order to soften the sealing compound.
  4. When the jars are hot and the stock is simmering, remove one jar from the pot. Empty the water into the sink and carefully fill it with stock, leaving a generous inch of space between the surface of the stock and the top of the jar. Do this carefully!! If you are serious about canning, you may want to buy a set of jar tongs. I do not have my jar tongs yet, so it was very awkward with my regular tongs and oven mitt trying to get the hot jars out of boiling water and then pouring them out.
  5. Wipe the rim of the jar with a cloth dipped in white vinegar (to help cut any grease), apply a warm lid, and screw on a ring band. I read a tip somewhere that it helps to pour 2 Tbsp of vinegar into the pot water to cut down on the water marks left on the jar. I did this. My jars still have water marks and now I have to scrub the smell of vinegar out of my canner. Great tip :(
  6. Place the filled jar into the pressure canner and repeat the process until all your jars are filled and the stock gone.
  7. Put the lid on the pressure canner and lock it into place.
  8. Bring the heat up and let the canner run with an open vent for 10 minutes. You want to get as much air out of the canner as possible.
  9. When the stream of steam coming out of the vent lessens, put the vent weight on the port. If you’re using a weighted pressure canner, choose the 10 pounds of pressure side of the weight.I waited 20 or so minutes and the steam stream only lessened slightly. Be careful putting the weight on the port!!! That steam is hot and we do not need any burns! I looked lovely trying to get my weight on my pot. I had my hands covered in oven mitts and used a long set of tongs.I dropped the damn thing 3 times before I managed to get it on the pot!
  10. If you’re using a gauged pressure canner, watch your gauge. You need it to reach 11 pounds of pressure.
  11. Once the weight is jiggling the appropriate number of times per minute, or the gauge has reached 11 pounds of pressure, set a timer for 25 minutes.
  12. Keep tabs on your pot to ensure that the jiggles or gauge number don’t drop below their prescribed levels. You may need to reduce the heat to keep the pot where it should be, pressure-wise. If it goes higher than 11, lower your heat. If it goes lower than 11, raise your heat. Simple enough.
  13. When the time is up, turn the heat off under the pot and let it cool completely before touching. I tend to do my pressure canning right before I go to bed, so that I can leave it to cool all night long.I waited a few hours and got antsy. The pressure was all the way down and the jars were warm, yet not too hot to handle.
  14. When the pressure is totally down and the jars are cool enough to handle, remove the jars from the pot. Wash them (the stock often leaks a tiny bit during processing, which can make the jars a little grungy) and remove the rings.
  15. Label with the contents and date and store in a cool, dark place. Masking tape!
  16. Pressure-canned stock will keep up to a year on the shelf.


So I tried to can 3 quarts of broth. Two of my jars sealed perfectly, while the third (on the right) was kind of questionable. The rubber seal around the lid seemed completely sealed, but the center of the lid bubbled up a little. The two jars that sealed properly were very smooth and almost seemed sunken in a little. Canning recipes say if you do not get a proper seal, you can refrigerated the product and use it within a week usually. I left my jars out on the counter overnight. I am almost positive now the third jar did not have a proper seal. The color turned much darker than the other two jars. Leaving it out without the proper seal must have done something to the broth so I dumped that one. It is a shame I left it out instead of putting it right in the fridge, but it was all a learning experience. At least now I know some signs to recognize an improperly sealed jar.

For my first canning experience, I think a success rate of 2 out of 3 is pretty good!

Wednesday, June 6, 2012

One Pot Wonder


Talk about a quick easy dinner. I used one of my mother's favorite techniques of throwing random food and chicken in a pot and letting it cook. Unfortunately my mother and I do not see eye to eye on food preparation, so instead of her usual butter, Alfredo (or cream of chicken soup), chicken, and veggie concoction; I created a healthier one pot wonder. Having no idea what to do for dinner yesterday morning, I pulled out some chicken to thaw and contemplated the meal while I was working. Again, with the American mindset of meat = dinner. Bad habits are hard to break! As much as I like to stay away from processed foods, I do have some of those Lipton flavored rice packets in my cabinet. I very rarely use them, but they are a quick fix when I am all out of meal ideas. My dinner was in peril of becoming a processed flavored rice mix, baked chicken, and steamed veggies. How boring!!

After work, I went to the gym and worked my butt off. I really needed that post vacation workout to get my body back on track after the vacation food bender. At least we did a lot of walking while we were away. After 45 minutes of intensive cardio, there was no way my body wanted that salty, processed, and dehydrated crap. Luckily I had some fresh veggies on hand, because a brilliant idea hit!

You could prepare this recipe with any assortment of veggies you have on hand. All you need to know is their cooking times to make sure you dont over-do one type while not completely cooking another. The recipe I am providing is simply what I used. Use more or less of whatever you want. You can even change it up completely.

  • 1 bunch kale, ribs removed and leaves torn into bite sized pieces
  • 2 potatoes, sliced
  • 2 onions, chopped
  • 2 chicken breast, diced
  • 2 cups veggie broth
  • 8 mushrooms, quartered
  • Just a dash of garlic powder
Put all ingredients, except mushrooms, in a large pot.Cover and simmer on medium-low heat for 15 minutes. Add mushrooms. Cover and simmer for another 5-10 minutes. Make sure the chicken pieces are fully cooked. Add garlic powder and serve.

At first this meal was a little bland for my taste buds, so I added a dash of ground pepper. After a bite or two, I really did enjoy this quick and easy meal. As an added bonus, I felt very full after just one bowl. I didn't have to eat a lot to be satisfied. Must have been the kale! I didn't put too much kale in Sophia's bowl. It does have a strong and unusual flavor, so it is one I am slowly introducing to her. Her bowl was filled with chicken, onions, mushrooms (which she instantly picked out), and potatoes. My child may be the only one in existence that does not like french fries, but she sure does like cooked onion. Which brings me to a thought....

Many people consider me strict when it comes to meal times. I'll admit that I am. I have my reasons though. A friend of mine complained just last night that she has to get up from her meal multiple times at dinner to retrieve something for her indecisive child. I would never judge a mother on how she runs her household, but that is something I just couldn't do. A lot of times, sitting down to a meal is the only break in the day I get. Heck, sometimes it is not even a break, since I work through a lot of my lunches. I make sure Sophia has everything she needs to enjoy her dinner (sometimes I forget the ketchup, but she can reach that herself if she wants it). What I serve is what's for dinner. Very occasionally, when I try a new exotic or spicy recipe, I will make her something else - but only after she tries at least 3 bites. A child will usually eat what is provided for them, especially when they know it is the only option. I believe that my child is not a very picky eater is directly correlated with not giving her the option. If she wants to eat, she eats what she is given. No snacks if she doesn't eat enough and definitely no snacks immediately after dinner when she does not finish her plate. My child eats and enjoys just about every vegetable that I serve. Some days she may not like something, but I continue to serve it to her. On more than one occasion, she liked it a second or a third tasting. I also do not tell her the name for some of the more questionable veggies on her plate. Instead of letting her brain decide what she likes, it forces her taste buds to decide. That has been my best method in getting her to like something she previously was not a fan of. My way may not work for everyone, but I think it is a good way to be. Believe me, it would be much easier to pop in some microwavable (processed) chicken nuggets each night instead of listening to her whining and compromising on how much she is supposed to eat. Sometimes the better choice is not always the easiest...

I must say, it was really nice not having to slave over the stove for dinner. I was able to get some other things done around the house while dinner was cooking. As a single mom, I don't always have that luxury!

Tuesday, June 5, 2012

Potato Onion Soup


I've come to realize, even as infrequent as my posts have become (being a single mom is busy business), I am mostly only posting vegetarian recipes. I do not want to give the impression that I turned full on vegetarian, though I would love to have that sort of commitment. It's just the only new recipes I have been interested in are vegetarian. One of the big obstacles keeping me from going vegetarian is the typical American mindset. We were born and raised to think dinner is meat. Deciding what to make for dinner, especially quick easy meals during the week, is so hard if I don't have meat as the main course to build from. Lots of vegetarian dishes seem so much like side dishes, I have a hard time making them my complete meal. I've been working on it. I love the idea of making vegetarian soup, since the leftovers make for a couple nice and easy work lunches. Pasta's are an easy vegetarian fix, but I do not want to rely on them too much. I am always on the lookout for my bulging waist line. The mommy muffin top is going down, but is not gone completely! So, that is the explanation of why most of my recipes seem geared towards vegetarian. The health and environmental benefits of going meatless are astronomical, so learning to cook with little to no meat is a major interest of mine lately!

Figuring out a meatless meal for last night's Meatless Monday was a bit of a challenge. We just came back from a week vacation and the fridge was close to empty. I stayed meatless for the Monday on vacation, but cannot claim to have eaten healthy for the rest of the week. I even drank SODA a couple times ::gasp:: Well, now we are back to reality and a whole 7 lbs heavier. While I was planning to stop at the market to gather up some fruits and veggies to stock our fridge, keep in mind I was also having to work with a post-vacation budget. Before vacation, I cleared out all the veggies that would not last the week away. All I had left in my kitchen was onions, potatoes, carrots, and garlic. By googling recipes containing onions and potatoes, I stumbled upon a great soup.Luckily I had some homemade veggie broth in the freezer.

  • 4 onions, sliced thin
  • 7 potatoes, peeled and diced
  • 2 cloves garlic, smashed and sliced
  • 4 - 5 cups vegetable broth
  •  2 Tbsp oil
  • 3 Tbsp milk **optional. I used soy, but regular milk could work as well.
One think I loved about this recipe is the prep work can be done as you go.

Slice the onions and put into a large pot with the oil and cook on low heat. Slice up the garlic and add to pot. Continue to cook on low until onions start to soften. Peel and dice potatoes, then add to pot with onions. Stir to coat all ingredients with the oil. Cover and simmer for 10 minutes. Add broth. Bring to a boil. Cook until potatoes are very soft. Stir in the milk if you are using it.
Mash with a hand masher or let cool to process in a blender, depending on your desired consistency. I was really hungry, so I just used a hand masher.

This recipe took about an hour to create. A little long for during the week, but the second half hour is not very hands on. If you are short on time, most soups can be made ahead and frozen! A quick defrost could set you on your way to a nice delicious soup.

Another thing I love about this recipe is the simplicity. There are no herbs, salt, or pepper and it works wonderfully. Since I used my homemade broth, the sodium is minimal. This is a great recipe to have on hand when you are low on ingredients or cash. I also had carrots on hand, but decided not to use them. Next time I definitely would. The more veggies, the better!

Sophia has been having a hard time eating lately. For a while, she was doing much better. She was eating everything on her plate and was very proud of herself! Lately, she complains that her stomach is hurting at just about every meal, yet she never complains of these pains at any other time. I am sure this is because she does not want to sit through the boring task of eating a real meal when she would rather be having snacks instead. She very rarely complains about the taste of a dish, but it's the actual eating that seems cumbersome. Last night she did not want to eat her soup, but she also was not saying it taste bad. I managed to get her to eat half the soup along with a slice of buttered bread. Since she did not complain about the taste, I will definitely be making this again.

Tuesday, May 15, 2012

Quinoa Mac & Cheese


First off, Id like to apologize for the quality of my pictures. My camera broke and I'm pretty much too broke to buy a new one, so cell phone pics it is from now till who knows when. Sometimes my cell phone takes very good pictures. The Florentine Stuffed Shells picture from my last post was from my cell phone. It has a mind of its own when it comes to taking decent pictures. I am also in the market for a new cell phone (and possibly a new carrier) and that will take precedence over the purchase of a camera. I am fairly addicted to my phone...

I was racking my brain trying to come up with a better title for this dish. The original recipe was also labeled "Quinoa Mac & Cheese". I have a hard time accepting this name, because quinoa is not macaroni. Quinoa is not pasta of any sort; even though you can get quinoa pasta. I've never tried that, but it does intrigue me. I am sure it is a wonderful option for those on a gluten-free diet. I couldn't think of a fun catchy title, so I guess I'm stuck with one that bugs my eyeballs.

  • 1 1/2 cups cooked quinoa
  • 1 1/2 cups shredded cheese (I used sharp cheddar, but feel free to play with flavors!)
  • 2 eggs
  • 2 garlic cloves, minced
  • 1 cup soy or fat free milk (I used rice milk)
  • A handful of breadcrumbs *
  • 1 lb asparagus or any other veggie of your preference**
*To make gluten-free, leave off the breadcrumbs.
 **I used asparagus because it is in season right now, but you can use anything. I'm sure broccoli or cauliflower would work nicely. You could even shred up some carrots if you need to hide veggies in your dish. There is also the possibility of not using any vegetables whatsoever, but I think that would just be stupid. Add veggies to your diet whenever possible!!!

Preheat oven to 350. Saute garlic and whatever veggie you choose to use.Whisk eggs with milk and then fold into quinoa. Fold in vegetables and cheese, preserving some cheese to sprinkle on top. Add mixture to a 9" x 13" baking pan. Sprinkle remaining cheese and breadcrumbs on top. Bake for 30-35 minutes.

This meal comes with mixed reviews, from both Sophia and I. Sophia raved over how it smelled. She was amazed that even though it didn't look like regular Mac and Cheese, it smelled like it. After her first few bites, she told me it was so yummy and she wanted me to pack it for her school lunch the next day. Then she had a change of heart and started begging me to make her a sandwich instead. I have no idea what would have caused her to change her mind so fast. Eventually she came around and ate most of her bowl, probably only because she knows if she gives me a hard time about dinner; she will not be allowed to have any snacks all night long.

I liked the meal, but did think it was a little bland. I would have liked if there was a creamier cheesier sauce surrounding the quinoa. More cheese next time? The original recipe I used suggested topping it with salsa, sour cream, or hot sauce. Adding salsa helped it not be so bland. This meal as leftovers seemed a bit more appetizing. Maybe, as with soup, the ingredients blend better after some time.

 I love the idea of using quinoa more often, but it is pretty hit or miss with me. It was wonderful when I replaced the rice in my Stuffed Tomatoes and it is also great with eggs in the Quinoa Breakfast Bake. Some other recipes I have tried were not as appealing. Those recipes should have been posted on this blog as well, but I've pretty much been a slacker. Ill keep chipping away at quinoa recipes to discover which ones are best.

Quinoa is a super food and I sure do like being super!! I'm also pretty corny (and corn on the cob is delish!!) Haha, I'll stop now...