Wednesday, December 28, 2011

Bean and Ham Soup


This soup came to fruition through a happy mistake. I hosted a holiday pot luck get together for my girlfriends. As the host, I decided to make a ham and have everyone bring sides. We decided to have this dinner on a weeknight, as to not conflict with anyones previously planned family parties. All was fine and good until I went and got hired for a full time job. I wasn't going to be home from work with enough time to make my ham. After researching a few recipes, I decided to put my ham in the crock pot while I was working.

I will never do a ham in the crock pot again! All my ladies said it didn't taste bad, but I was completely disappointed! My ham turned black after sitting in the crock pot all day. I had used a can of pineapples and honestly I forget what else to flavor the ham while it cooked. My sister's theory is the sugar from the pineapples turned the ham dark. I don't know if I am buying it. All I know is I will never do a ham in a crock pot ever again. If any of you that are reading this have managed a successful crock pot ham, could you comment and let me know how you did it?

As much as I was disappointed in that ham, I could not let it go to waste. My friends and their kiddos did eat some and noone complained about the flavor, but I think they were just trying to be nice. I was left with a large portion of ham as leftovers. I saved it, along with some leftover corn, to make a bean soup. As much as I did not like the ham, I didn't want to waste it. So back into the crock pot went the ham.

To transform this ham from dull dark brown mess to delicious soup, I added:
  • 2 cans pinto beans, rinsed and drained
  • 1 can chick peas, rinsed and drained
  • 1 can kidney beans, rinsed and drained
  • about 2 cups corn (leftovers)
  • 3 cloves of garlic, minced
  • 4 cups vegetable broth
  • 3 carrots, diced
  • 1 onion, diced
  • 1 bay leaf
After I stirred all the ingredients together, I set that baby on low and let it cook about 8 hours.

This soup is very hearty and filling. I am normally a big eater, but a small bowl of this soup along with some spinach salad stuffed me. I have not tried to give this to Sophia yet, as I have been packed it for lunch at work, two days in a row. My sister took sample, so hopefully soon I will see what she thinks.

Tuesday, December 27, 2011

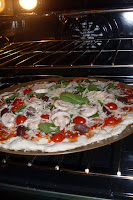
Veggie Pizza


Ive been getting a bit bored with the "experimental" vegetarian dishes. Plus, the holidays exhausted me so much, I wanted to do a Meatless Monday recipe that was pretty simple. When I originally decided on doing a veggie pizza, the plan was to buy one of those premade crusts from the store and going from there. As everyone can tell by now, I don't like to take those premade short-cuts very often. As I researched pizza crust recipes, I found one that could be made using all ingredients I had at home already. Score! This recipe is one of the few that I found not using yeast. I believe this makes the crust gluten free, though I am not sure how the all purpose flour works into that category. If you are allergic to wheat, please do not take my word on the fact that this pizza is gluten free. Anyone who is allergic would obviously know what to look for better than myself, but just to be safe....please do not trust my judgement!! I also do not know if any of my toppings could be considered gluten free either. It is not a subject I am well versed on, since I do not know anyone who is affected by a wheat allergy (knock on wood).

  • 2 1/4 cup flour
  • 2 3/4 tsp baking powder
  • 1 tsp salt
  • 1 cup water
Mix dry ingredients. Add water and oil. Stir until it forms a ball. If dough is stiff, add a little more water. Kneed for 3-4 minutes on a well floured surface. Spread thin on a pizza baking sheet. Bake on 400 for 5 minutes. Top crust with preferred toppings and bake for an additional 15-20 minutes.


OK....big oops!! I completely forgot the oil when I made this last night and didn't realize until I was copying the recipe that I had done so. Though my big oops could really be a little oops since the pizza came out fabulous and no one thought there was anything missing. Maybe I will leave out the oil from now on to cut some calories. I will probably try it at least once with the oil to see if there is much of a difference, but this blunder was really no biggie!

Spreading the dough out thin took alot of patience. My kitchen is lacking in some supplies and I do not know what I need until the very moment that I need it. Last night I realized I need a rolling pin and a pizza cutter. I kneaded the dough thin by starting in the middle and working my way out in a circular fashion. This would have been way more fun if I had the skills of a professional pizza tosser. Sadly, I do not so I was reprimanding my dough anytime it would tear even in the slightest.

Once the dough is baked for its preliminary 5 minutes, it is ready to be topped! You can top a pizza with just about anything under the stars, as I am sure you already know! With such a simple crust recipe made from kitchen staples, this would be a great meal to make when you have not planned anything or for those days when you desperately need to go food shopping and just don't have the motivation. No sauce handy? Use some garlic and oil to make a white pizza! No cheese? Tomato pie! Add any combination of meats and/or veggies that will tickle your taste buds. I probably have never been so excited over eating pizza. The take-out menu places just can't compare to my fresh pizza made in my own oven.

This was a great meal to have Sophia get involved in. Since I did plan ahead, we decided what toppings we wanted and went to the market to pick them up. Sophia decided she needed spinach. For such a picky eater, I seem to have the only child in the world who hates french fries but loves spinach. Not complaining, but I can not figure that one out! I wanted a bit more on my portion of the pizza. This pizza wound up being LOADED with fresh veggies and cheese! I had spinach, olives (not the canned kind, the good ones!!!), sliced grape tomatoes, and mushrooms. Yum! This reminded me of a fancy bistro style pizza. Definately not the greasy mess you can have delivered.

We invited my friend Krystle to come over and make pizza with us, so she managed to get some great pictures of our evening! They got all jumbled out of chronological order, which bugs my eyeballs, but you get the idea. I am not necessarily the most tech savvy person out there.


Monday, December 26, 2011

Baked Eggs with Tomato and Green Pepper


Have you ever baked an egg? I have not. I have scrambled, fried, and baked USING an egg, but I have not actually ever baked an egg. Who would ever think of putting an egg in the oven as a main ingredient to a dish? Surely not I! Until now!

This was the first Christmas that Sophia and I did not live at my parents house. I cannot imagine what Christmas morning with just my parents and younger brother was like at their house. My mom had asked me if they could come here to see Sophia open her presents and while I completely understand wanting to experience that joy and magic of Christmas morning through a child's eyes, I did not allow it. I was excited to have a special morning with my baby, plus I didn't think it would be fair to make Sophia wait until guests arrived to open the gifts. Since I was little, the first child awake would wake the whole house and the gift opening would happen immediately. However, I did make Sophia wait for me to brush my teeth and make a cup of coffee before beginning. Lucky for her, we have a Keurig which takes about 30 seconds to brew. I invited my parents to join us for a Christmas breakfast so we could have some quality time together before we all headed over to my sister's house for dinner.

I knew I wanted to make my apple-cinnamon pancakes and serve pork bacon. The apple-cinnamon pancakes are made by adding my homemade applesauce to the pancake batter, easy peasy! I very rarely buy pork bacon. For health reasons and taste preferences; if I cook bacon, it is always turkey bacon. My mother is not a big fan of the turkey variety, so I wanted to treat her to some pork. Then I stumbled upon baked eggs while browsing Pinterest. Every recipe I found told me to crack an egg into a muffin pan over top of some diced up veggies. The pictures with the recipe show the final product looking like a sunny side up egg. I like to eat eggs over medium, but my mother will not eat anything runny at all. This recipe seemed so convenient, since I could cook them in the oven while concentrating on the food I had going on the stove. I decided I would beat the eggs so they would bake scrambled or omelet style. I used 10 eggs and added diced green peppers, diced tomatoes, and half a very finely diced onion. I sauteed the veggies before I added them to the egg to enhance the flavor and so they were not too crunchy. I poured the mixture into a muffin pan and let it bake on 350 for 20 minutes. If you are doing these scrambled styled, like I did, you can check for doneness the same way you would a cake. A butter knife will pull out clean if cooked completely.

These eggs were a hit! The 10 eggs filled up 12 muffin cups, so each little egg circle came to a little over one egg. I'm guessing you could make fewer eggs stretch if you beef them up more diced veggies or maybe even some bacon or sausage. They are like mini omelette's without the tricky flipping (or fattening oil) involved. Double bonus: I had leftovers to eat for lunch for today's Meatless Monday!!


My brother, Mother, and me in my kitchen Christmas morning.


Just a little Christmas funny. This cracked me up when I read it.

Monday, December 19, 2011

Onion Soup


I have crossed over to the dark side. I finally found a job after searching for 8 months!!! Yay, for me! Now, my story continues as a full time working mother. Meals will still need to be planned on the cheap and "waste not, want not" will always be my motto! I have figured out my New Years resolution this week as well. Though I already am a bit nuts about recycling, I plan to reuse more of the products that come into my home. An environmental science teacher told me once that reduce, reuse, recycle is stated in the order of appropriate actions. Reduce the amount of products you use and consume, reuse whatever you can at all times, and recycle anything that is left. It is a dream of mine to own a home with a garden outside and a compost pile to use all the scraps that are not able to be tossed into a "broth bag". I'm a green thumb with big dreams! I always feel my supply of Tupperware is completely lacking, so I decided my first step in this reuse process will be to save glass and plastic jars. They can be washed after original use and be used to portion out my homemade vegetable broth, which will then be frozen. I will also use them for single serving lunch portions to bring to work and to freeze leftover soups or sauces. Here I go, getting off track, when I haven't even jumped onto the track of intended conversation....my onion soup.

As my first day of real work in a long time, I was nervous that I would not be able to provide a nice meal for Sophia and I. Plus the added pressure of Meatless Monday (as much as I love it, Mondays take a lot of planning and prepping to go meatless), I needed to figure out what I could toss into my crock pot. In order to save myself a trip to the food store, I had to work with what I had. The main vegetable I had on stock was onions. I had a whole bag of onions for some unknown reason. Most likely I needed just one for a recipe, but buying a while bag was more cost efficient. Onions will never go to waste, especially when they can be frozen for broth. As much as I love it, I knew I was not going to be able to do french onion soup, because I don't have bowls heat resistant enough to put under the broiler, but I researched french onion soup recipes to gather some ideas of how I should do this.

Even though I was looking for the simplest directions possible for crock pot onion soup, every single recipe I found instructed me to caramelize sliced onions before cooking them in soup. So there I was this morning, awake extra early and cutting onions to caramelize onions in a skillet. I sliced up 5 onions and cooked them over medium heat with half a stick of butter. All the recipes I read also told me to be patient with the caramelizing process. It took about 20 minutes. Part of me wished I had thought to slice and caramelize the onions before I went to bed, but oh well....maybe next time I will think ahead. I let the onions cook as I got dressed and brushed my teeth. I also sliced up two carrots to throw into the crock pot once the onions were ready. So I did just that. I loaded up the crock pot with the cooked onions, the raw carrots, 3 cups of vegetable broth, some Worcestershire sauce, a bay leaf, and some rosemary. Three cups of broth seemed to be enough to cover the onions with liquid, but not by much as to not make the soup to liquidy. The recipes said to use beef broth, but I had my vegetable broth in the freezer. Plus it is Meatless Monday, so the beef broth could be frowned upon. (Mind you if I only had beef or chicken broth in my freezer, that is what I would use. I love the idea of Meatless Monday and I try my best to stick to the rules, but I am not going to run out and buy vegetable broth if I have a homemade substitute in my freezer.) After adding about 3 Tbsp of Worcestershire sauce and the other seasonings I've mentioned, I set the crock pot to low and went on my merry way.

The soup turned out to be just what I wanted. I probably added too much butter in the process of cooking which didn't seem to add much buttery flavor anyway. Next time I try onion soup, I will try to leave the butter out for healthy, skinny momma reasons. Served along with grilled cheese, I guess I did have all the elements of my favorite french onion soup, just as separate components. Maybe I didn't need that cheese either, but a girl has to eat! Sophia is a huge fan of dipping grilled cheese into any sort of soup I serve it with. She did eat some of the soup alone, but stuck mostly with the dipping of her sandwich. For a picky eater, she surprises me when she will eat onions. She will not eat them raw (who does? yuck!), but she definitely does not turn her nose up to a cooked onion. It is like a little ray of hope concerning my child's tastes.

Sunday, December 18, 2011

White Trash


I have not made Christmas cookies since I was a little girl. This year I wanted to do them so I had some deliciousness to hand out to people and so we had something homemade and fresh to leave out for Santa. Not that Santa needs any cookies in her belly this year, but its all about the memories for Soph. She was not very interested in helping with the cookie process, but she definitely likes being my taste tester! This year I made 4 types of cookies: Russian Teacakes, Oatmeal, Potato-chocolate chip, and White Trash. I had white trash only one time before now, when a co-workers wife made them for the holiday party. My supervisor was raving about it before they came in, so I needed to try them. As a salty/sweet kind of girl, I fell in love. Forget the other cookies, this was all I needed! Ive had the same reaction with my batch of white trash. Everyone loves it, plus they get a kick out of the name!

  • 9 cups non-sweetened cereal
  • 2 cups pretzel sticks, broken into halves
  • 3 cups peanuts
  • 2 - 12oz packages of white chocolate chips
Melt the white chocolate chips in the microwave for 1 minute. Continue to cook in 10 second increments until melted smooth. Mix cereal, pretzels, and peanuts in a large bowl. Gently fold white chocolate into the mixture. Once the mixture is evenly coated, spread onto a wax paper covered surface and let dry. Break into bite sized pieces.

This was so simple to make, especially since there is no baking involved. I used a mixture of Chex and Cheerios for my cereal. The hardest part was folding the chocolate into the mixture.
Once it was dry, I used a spatula to separate and then break into pieces. While I may mix my cookie variety from year to year, I have a feeling white trash will become a yearly tradition coming from my kitchen.

Thursday, December 15, 2011

Spaghetti and Clams


This dish is literally the only dish I will eat with clams. Frankly, clams disgust me. I don't know exactly what it is. I'd like to think it is the texture, but I love mussels so that cant be it. I grew up with my mother making this dish. The few times I have tried it before tonight; I never followed a recipe. I thought it was basically olive oil, canned clams, and minced garlic that made this dish. Boy was I surprised when I got curious enough to search for a recipe and found one with 7 ingredients.

  • 1/2 lb spaghetti, cooked
  • 1/4 cup butter
  • 1/2 cup chopped onion
  • 3 garlic cloves, minced
  • 2 - 8oz cans clams, drained with juices reserved
  • 1/4 cup parsley
  • 2 Tbsp olive oil
Melt butter in a large skillet over medium-low heat. Stir in onion and garlic. Cook 5 minutes. Add clams and stir for 3 minutes. Add water to the reserved clam juice to make 2 cups of liquid. Stir in parsley, olive oil, and clam juice mixture. Increase heat to boil, then reduce to a simmer. Cook covered for 15 minutes. Toss with spaghetti.


I was very pleased with how this turned out. There was definitely more flavor than my old way of making this dish. This proves every old comforting dish can be experimented with and even tweaked into a new favorite! I loved how easy this dish was. It seems as if there were alot of steps involved, but really it was not bad. I made the sauce as I boiled water and cooked the pasta. It took less than a half hour to complete!

I did not attempt to feed this to Sophia. My sister and her boys came over tonight for some traditional holiday fun, so we fed the kids some pizza. Both my sister and I did have seconds. She justified her seconds, because my bowl was bigger than hers. I justified my seconds, purely because she went for seconds.

Each year we get together to decorate gingerbread houses and trees. We plan for it to be a fun activity for the kids, however we usually wind up taking control and not letting the kids have much say in the decorating. They like to run around together. Whenever they pop their heads up to the table, they wind up shaking the table and eating the candy. It is nice to have tradition. One thing that has become tradition is each year on gingerbread night, we wind up with a Christmas catastrope. Our first year, Santa came to visit and the kids were petrified. He rang the bell and as they peeked out the window they ran screaming their heads off into another room. Last year, my sister was devastated because the kids wound up knocking her tree over and shattering most of her glass ornaments that she had been collecting since she was a teenager. This year our meltdown came for Sophia. We have an elf on the shelf in our household. His name is Scott. The one rule of all elves on the shelves is there is no touching allowed. Touching means the elf will lose his magic and cannot report back to Santa. My 3 year old nephew, Collin has an elf of his own but does not buy into the story. He touched his own elf yesterday and tonight he touched Scott. Sophia was heartbroken! We wrote a letter to Santa to ask for Scott to have his magic back since she was not the one that touched him. Luckily Santa is fair and allowed Scott to come back with his magic in tow. I don't know what I would have done if Scott could not be in our household at Christmas time. We love that little guy!


Swedish Baked Potato


This is the first recipe I have tried that I found on Pinterest. It was so simple to do. The flavor is pretty much like a regular baked potato, but I feel like it took less time to cook. Also, I like that I didn't have to use tin foil to wrap the potato. Less waste is best in my book!

To prepare the potato, simply slice the potato all most all the way through. You want to leave a little bit on the bottom uncut so the slices don't come apart. The recipe I had suggested slicing a garlic clove and putting the slices in between the potato slices. I didn't try this, but next time I may. You can top the potato with butter or oil and some salt and pepper before baking. I sprayed mine with some oil. Bake at 220 for about 40 minutes. The potato skin will get nice and crispy while the flesh becomes soft. You can eat it just as it comes out of the oven or top it with anything you would top a normal baked potato. This was not much more work than a traditionally baked potato and it looks so much prettier!

Wednesday, December 14, 2011

Crock Pot BBQ Ribs


Ribs are not something I make often. I have actually only ever cooked boneless ribs before in my pressure cooker. Once I obtain a grill, I would like to do more with ribs. There is also a skinny and saucy crock pot recipe I would like to try for ribs. Next time they are on sale!!

I didn't follow a recipe for this, just kinda went on a whim. First I broiled my ribs for 15 minutes to brown them. I do not own a broiler pan, so I lined one of my Pyrex dishes with aluminum foil and hoped for the best. No problems, thank goodness! I mixed some Worcestershire sauce with half a bottle of BBQ sauce and then brushed it on the ribs. Next, I plopped my meat into my crock pot and poured the remaining BBQ sauce mixture on top. I let them cook for 4 hours on high. They came out pretty good. Maybe not as tender as I would want, but definitely not tough at all.

Sophia loves ribs. I didn't let her eat them right off the bone because I didn't want her to make too much of a mess. I really think I need to work with BBQ and (especially honey BBQ) more often. She always loves anything BBQ that I have made. I will need to look into seeing if I can find a recipe for a healthier homemade option as opposed to what comes in a jar.

The only complaint I had with these ribs is some of the BBQ sauce burnt onto the side of my crock pot. It was so hard to get the black burn marks off the pot, but I was determined. My crock pot is white (DO NOT buy a white one!). I like to use it to entertain or to bring meals over to a family members house on occasion. Since I am not the only person that will see this essential tool, I want it to stay as nice and shiny as possible. I have not even been using this crock pot for a whole year and it is already showing stains. After soaking over night and scrubbing with a Brillo pad for a good 15 minutes, my burn marks finally came off. I started considering filling my pot with water and letting it simmer on low overnight in an attempt to soften up the burn marks. Maybe a smaller crock pot would have suited my ribs better. Maybe one day, when I have money, I will be able to afford crock pots of all different sizes. I think when that day comes, I will throw a crock pot party where everything I cook will come out of one of my variously sized crock pots!

A girl can dream, cant she??

Tuesday, December 13, 2011

Stuffed Tomato


Oh boy! I am a slacker! I am so behind on recipes right now! I have been blaming my holiday "schedule", but really I think the blame needs to go to Pinterest. Check it out, though you have been officially warned. It is highly addicting. You can browse the site for different stuff people have pinned or you can pin any sort of website you like to the page. I have been looking for recipes and craft ideas on there. Hopefully as I pin my blog entries, I will get a little more traffic. So, HI to anyone new that has found their way here through Pinterest!

Ive been getting bored with some of the vegetarian recipes I have on hand, so I went searching for some new ones. I decided upon this one because I had just about everything I needed on hand, all I needed to pick up was mushrooms. Since my family is so small, I cut the recipe in half to suit our needs, but I will share the full sized recipe with you.

  • 6 large tomatoes
  • 2 Tbsp oil
  • 1 1/2 cup sliced mushrooms
  • 1 cup chopped onion
  • 1 - 10 oz package frozen spinach, thawed and drained
  • 2 tsp minced garlic
  • 1 tsp dried basil leaves, crushed
  • 1/2 tsp salt
  • 1/4 tsp pepper
  • 1/2 cup quick cooking rice
  • 1/4 cup and 2 Tbsp Parmesan cheese
Preheat oven to 400.
Slice tops off tomatoes and use a spoon to remove pulp. Leave the shell to be 1/4 inch thick. Chop pulp and set aside. Heat oil over high heat in a skillet. Add mushrooms and onions. Cook and stir until tender, about 10 minutes. Add spinach, tomato pulp, garlic, basil, salt, and pepper. Cook over low heat, stirring occasionally, for about 10 minutes. Stir in rice. Remove from heat, cover, and let stand 5 minutes. Stir in 1/4 cup Parmesan cheese. Place tomato shells in a baking dish and spoon in mixture. Sprinkle Parmesan cheese on top. Bake 15 minutes.

I served this over a bed of white corn kernels. Pairing white corn with cooked tomato is absolutely to die for, especially when looking for tasty light flavors. I decided not to stir the Parmesan into the mix, since I am trying to lose a few lbs. The extra calories were not missed! This was absolutely delicious. Sophia loves spinach so she gobbled it right up. I tried chopping the mushrooms on her plate to tiny bits to get her to eat them. She was not fooled at all! They had to go! I am definitely going to serve this again. It seems like it could be more of a summer meal though.

One little tip: if you are big on presentation, be majorly careful transferring your tomato from the baking dish to a plate. The tomato becomes so soft that it will fall right apart. I managed to get one for my mom transferred nicely, but I had to use my hands instead of a spoon. Not the most hygienic during flu season, but I swear I did wash them first!!!


Since I am so behind (well only two days behind actually, but Ive spent lots of time in the kitchen these past two days), I am able to give you a sneak peak of what is coming up next. I have not posted my Sunday dinner yet, which consisted of Crock Pot BBQ ribs and Swedish baked potatoes. Also, I spent most of my day yesterday baking Christmas cookies. I now need to get them out of my house! I have Potato-chocolate chip (which has already been posted), oatmeal, Russian tea cakes, and white trash. As soon as possible, I will share all the delicious goodies with you!

Saturday, December 10, 2011

Vegetable Broth Fail

I attempted to make my first batch of vegetable broth using the scraps I had been hoarding saving in my freezer. I was so excited to do this and even more excited to make more room in my freezer. That Ziploc got pretty big once it was packed! My excitement stepped up to another level when I realized one full Ziploc bag held the exact right amount of veggies I needed to fill the crock pot. I did not need to add anything else to the pot. I only added 3 ribs of celery I had in my fridge as to not let them go to waste. I probably should have added a bay leave or two though it really didn't matter. My broth turned out horrible. It smelled wonderful, but tasted way too acidic. My mistake was clear to me as soon as I tasted it.

I figured vegetable broth really could be "grown from the earth" broth. Figuring they would just add some sweet flavor and some extra nutrients, I tossed apple cores and lemon wedges into the bag along with celery, onion, pepper, leek, and garlic scraps. The apple cores were not the problem. I have used them successfully in both vegetable and chicken broth. It was the lemons. I completely underestimated the powerful flavor held in a citrus rind. I also lost track of the amount of lemon I had popped in the bag. Not until I was separating the vegetables from the broth did I realize there was probably two whole lemons in the mix. The lemon completely overpowered every other flavor and killed it. I would maybe suggest doing one half quarter of a lemon for a whole batch of broth. Who knows if I will ever try lemon again. It was a sad moment indeed as I poured a whole batch of broth down my drain. Good thing this was made from all leftover scraps, so I was not pouring any extra money down that drain. Luckily I have another Ziploc bag almost full in the freezer, so I won't have to wait too long to be able to make another batch.

Wednesday, December 7, 2011

Mushroom Roast


This roast happened by mistake. It was a "plan b" using ingredients I happened to have in my cabinet. I originally wanted to make a two can cola roast, which is possibly my favorite meat recipe using the pressure cooker. After spending a good 15 minutes making a list, I went food shopping Sunday morning to get the odds and ends that I needed to prepare my meal. Naturally I forgot my list! So from memory, I had to get everything I needed. This is a dangerous practice, because I always wind up buying much more than I am supposed to. Since my household is a non-soda drinking environment (with the exception of parties) I completely forgot I needed the two cans of cola. I never even walk down that aisle at the store! So not until I was home and completely involved in productiveness (a very rare occasion for me) did I realize that I forgot it. I did not feel like heading out again, so the only option was to work with what I had. I decided to use a pork chop recipe I had for my crock pot. I still followed the time and temperature directions for the pressure cooker, but used the ingredients for the sauce.

  • 2-3 lb pork roast
  • can cream of mushroom soup
  • 1 onion, chopped
  • 1 pack onion soup mix
Place the onion in the bottom of the pressure cooker. Put the roast in over the onions and top with the sauce. Mix one can of water with the onion soup mix and pour in. Cook on high for 40 minutes. Let the pressure release naturally for 10 minutes and then perform a quick release.


This sauce is actually my sisters favorite recipe to use on her pork chops, so I knew it would turn out pretty good. I added the can of water because a pressure cooker usually calls for more liquid to cook. I wonder if the soup would actually be enough liquid. One day I'll test that. If any gravy you make comes out too thin in a pressure cooker, a simple fix is to add some cornstarch and set the pot to brown with the lid off and the meat removed. Some of the liquid will burn off as it boils down.

I think I like the two can cola roast better. It is more flavorful and sweet, but this recipe was definitely delicious.

Bacon Wrapped Green Beans


So I am playing a little bit of catch up. This recipe was from a dinner I cooked for my mom and brother Sunday evening. I knew I wanted to serve corn and mashed potatoes, but wanted something with a little more nutrition value. Also, the roast I was making was a bit on the smaller side so I wanted more meat.

  • One package of frozen whole green beans
  • 3 Tbsp olive oil
  • Italian seasonings
  • Bacon slices
Pour oil into a large bowl and sprinkle seasonings into it. Put green beans in oil and toss. Grab a bundle of about 5 beans and wrap with the uncooked bacon. Place into a baking dish. Roast in the oven on 350 for approximately 30 minutes.

I used some turkey bacon I had left from a breakfast earlier this week. Whatever green beans I had leftover, after wrapping the beans with bacon, I poured into the dish over the wrapped bundles. I was very happy with how these turned out and Sophia was excited to have bacon at dinner. This child loves bacon way more than I ever did!

Monday, December 5, 2011

Mushroom Veggie Burgers


I was the most nervous about how this meal would turn out than I have been for just about any of the recipes I have created for and posted in this blog. First, I have only ever had one veggie burger in my life and that was from a restaurant. Second, it is Meatless Monday and I had no Plan B in case this didn't work out. Third, I had two girlfriends over for dinner tonight and I always strive to please guests.

  • 3 Tbsp olive oil
  • 16 ounces small portobellos, sliced
  • 1/4 cup onion, diced
  • 1 can black beans, rinsed and drained
  • 2 cups quick cooking oats
  • 1 packet vegetable soup/dip mix
  • 1 egg
Heat 2 Tbsp oil over medium heat. Add mushrooms and onions. Cook and stir until soft, about 5-8 minutes. Transfer to a food processor and pulse until coarsely chopped. Transfer to a large bowl and stir in 1/4 cup water and the soup mix. Let stand 15 minutes. Place beans in food processor. Pulse until coarsely chopped. Transfer to bowl. Add oats and egg, mix well. Form mixture into 4 patties. Cover and refrigerate 30 minutes. Heat 1 Tbsp in a skillet over medium heat. Add patties to skillet and cook 3-4 minutes per side, until browned.


I was definitely nervous. First, my blender is crap. It spins and chops whatever food is in the middle of the pitcher and tosses it to the sides, where it stays. I had to battle processing the mushrooms and the beans. Once I get a new blender I will have to resist the powerful urge to not toss my junk one right out the window. Once I had everything properly chopped and the patties formed, I was even more discouraged. They felt so mushy. Gross. They did get a little more solid once they sat in the fridge for a half hour though. Cooking them was not easy. The patties did not seem to want to hold together completely. They didn't crumble but they were splitting in half.

The final product was not bad at all. I was so relieved that they were even edible! My girlfriends enjoyed them, which made me even happier. I topped mine with some sour cream and tomatoes. The others added some cheddar cheese as well. Soph wasn't the hugest fan of the burger but she did eat about half of it, so not a complete fail.

Another successful Meatless Monday in the books!

Christmas Soup


I had originally set out to make some plain old vegetable soup, until I realized that each of the ingredients I used were festive colors. Unto us, Christmas soup was born!!

  • Half a head of cauliflower, chopped
  • 3 ribs celery, chopped
  • 1 onion, diced
  • 1 can diced tomato
  • 4 cups vegetable soup
  • 1 package french cut green beans
  • 1 bay leaf
Combine all ingredients in crock pot. Cook on low 5-6 hours.


Vegetable soup is one of the easiest things to make. Just toss whatever veggies you like in the crock pot with some broth and seasonings to have a nice healthy meal. Most of the vegetables I used were ones that I needed to get use before they spoiled. This as an appetizer for a big Sunday dinner I made for my mother, with the added benefit that it can be enjoyed as leftovers on Monday! 

I've been slacking a bit on this blog, basically since I have been all wrapped up in preparing for the holidays. For my Sunday dinner, I prepared a Mushroom roast with mashed potatoes, corn, and bacon wrapped green beans. Hopefully I will have some time today or tomorrow to share the roast and green bean recipes!


Saturday, December 3, 2011

Chocolate-Potato Chip Cookies


  • 1 cup sugar
  • 1 1/2 cup crushed potato chips
  • 1/3 cup chocolate chips
  • 2 1/2 cup flour
  • 1 tsp baking powder
  • 2 sticks butter, softened
  • 1 tsp vanilla extract
Preheat oven to 350.
Mix sugar and butter until it becomes creamy. Fold in vanilla extract, chocolate chips, and potato chips. Finally mix in flour until it becomes a crumbly texture. Using your hands, form into balls about the size of walnuts. Flatten between palms. Bake for approximately 18 minutes. Cool 5 minutes on baking sheet and then transfer to a wire rack to cool completely.
Yeilds about 2 dozen cookies.

Tonight was actually my second attempt at these cookies. The first attempt was Tuesday night. Soph and I had to head up the Poconos, because I had a meeting Wednesday morning. We spent the night at my parents house up there and these cookies were meant to be a nice cozy activity for the two of us before bed. They were a disaster. I followed the recipe, but I managed to use too much butter. I had to trash the entire batch. I don't know if I can actually call what I made a "batch". They all melted into one giant rectangle that filled the cookie sheet. When I saw this, I thought I could save them by letting it cool and cutting it up to make cookie bars. No such luck. They were so melty and soft that they just crumbled. Definitely too much butter. It was a stupid mistake on my part. I was scared to attempt these again, but I have been so excited over this recipe and what I plan to do with it. So I proceeded to round 2 with low expectations.

The cookies are pretty good! I do think I crushed the potato chips too small though. As this was a test run for the big cookie blowout I am planning, the next batch will have larger and possibly more chip chunks to make the salty potato flavor stand out a bit more boldly. While I don't particularly like foods too salty, I am a huge fan of salty combined with sweet. Not many people would think of mixing potato chips with chocolate. A lot probably wouldn't even try it. I never heard of the combination until a family trip to Hawaii. We visited a chocolate factory and there I found chocolate bars filled with crumbles of potato chips. I fell in love right then and there. I also fell in love with chocolate covered pineapple while in Hawaii, at the Dole Plantation. I spent years with my eye out for any sort of chocolate-potato chip mixture with no luck. It wasn't until this past spring, when Soph and I moved into our own apartment, that I thought about combining the two myself. I made a huge batch of chocolate drizzled potato chips. They are a little bit of a pain to make, but so worth it!

I am not sure if I have shared this yet, but currently I am out of work. I have been working part-time to try to make ends meet while I look for a full time career to support me and my child. Anyone out there hiring?? Obviously money has been tight this year. I usually buy presents for all my grandparents, aunts, uncles, and Sophia's teachers. Not something huge, but something. I decided it would be more from the heart and definitely more frugal to do homemade presents this year. Homemade presents usually look just as they sound, homemade. AKA: crap. I am not really into handing someone something I made if it isn't something that can actually be used. Needing something somewhat simple, I searched the internet and found gold! Gifts-in-a-jar! There are so many recipes and ideas that can be put in a jar or mug. I even found this potato-chocolate chip cookie recipe on that site. Perfect for me. It shares my love of cooking with my loved ones, while helping them experience such a crazy good combination of flavors! Plus, I can manage to keep some of my funds intact. I plan on sharing a more in depth post about these jars when I actually make them. The basic idea is to layer the dry ingredients in the jar and tag it with instructions on how to finish the recipe.


Just an idea of what my finished product will look like.


Thursday, December 1, 2011

Meatloaf and Mashed Cauliflower

I consider meatloaf to be the soup of meat. You can put just about anything into it for it to be delicious. I have never followed a recipe for meatloaf and of all the countless times I have made it, I only remember disliking it once. I stick with a few simple rules: always add an egg, use some sort of breadcrumb type substance, and top it with something.

I have been told an egg is not always needed. I am pretty sure the egg adds moisture, so you can substitute with mayo or something. I'd rather not have mayo in my meat, so I stick with the egg. The breadcrumbs help to hold the ground meat together. If you don't have breadcrumbs on hand, use crushed up crackers, goldfish, cheese its, pretzels, chips...whatever really. Don't take my word for it on the chips, though. It seemed to sound good after pretzels, but try it and let me know! And last, I do not like a naked meatloaf. The topping doesn't add much flavor to the meat, but it is pretty and I like it. If you are preparing a gravy to pour on top, then that can be considered the topping. I have mostly used some ketchup and brown mustard, but on occasion I mix it up. I have used spaghetti sauce, cheese, and crushed crackers. The options are limitless; try BBQ sauce, salsa, herbs, bacon...whatever floats your loaf! Just about anything you put on top of your meatloaf can also go inside.

My standard meatloaf consists of ketchup, brown mustard, herbs (oregano, basil, parsley), egg, breadcrumbs, and garlic powder. Sometimes I feel adventurous and start grabbing things in my fridge and throwing them in. Tonight's meatloaf consisted of the usual egg, (pretzel) breadcrumbs, and brown mustard; but then things got interesting. First I added a chopped rib of celery. Every time I buy celery it goes bad before I can use it all, so I try to get creative with it. Then I added some spaghetti sauce, Worcestershire sauce, some onion dressing I have, shredded cheddar cheese, and parsley. I topped it with some more spaghetti sauce and cheddar. Covered it with foil and baked it on 375 for about 45 minutes. During the last 10 minutes, I remove the foil so the edges get a little crispy.

I served this with some corn and mashed cauliflower. Mashed cauliflower is supposed to be a healthier replacement for mashed potatoes, so I figured I'd give them a shot. I boiled the cauliflower florets with one clove of garlic, then mashed them with a tiny bit of milk, some margarine, and some of the water it boiled in. They actually kind of smelled like potatoes while cooking! The consistency didn't come out as I would have hoped for, but this is something I would like to keep working on until I get it right. I saw some recipes that suggest adding in a potato or two to get it closer to the desired texture. I may just do that next time.

Soph didn't eat any of this meal. She was at my sisters eating pizza. I don't think I can serve her mashed cauliflower until I get it just right. Her absolute favorite food is mashed potatoes with corn. I can never completely take real mashed potatoes away from her, but it would be nice to have a healthy alternative sometimes. 

Monday, November 28, 2011

Minestrone Soup with Tortellini


Loosely translated from Italian, Minestrone means "The Big Soup". You will be able to find many different recipes for this soup, as the ingredients are not set in stone. I found this recipe in my pressure cooker cookbook. I vaguely remember usually seeing beans anytime I have had minestrone, but this recipe did not include any.

  • 2 Tbsp olive oil
  • 1 onion, chopped small
  • 2 stalks celery, cut into 1/4 inch slices
  • 2 carrots, cut into 1/4 inch slices
  • 1 Tbsp minced garlic
  • 8 ounce package cheese tortellini
  • 4 cups vegetable broth
  • 1 jar spaghetti sauce
  • 1 can diced tomatoes
  • 1 1/2 tsp Italian seasonings
  • 1 tsp sugar
  • 1/4 tsp ground pepper
Add the oil to the pressure cooker and set to brown or high, with the lid off. Saute onions, celery, carrots, and garlic until onions begin to sweat. Add the remaining ingredients and stir. Lock on the lid and cook on high for 5 minutes. Perform a quick release. Check tortellini. If it is too al dente for your liking, continue to boil on high or "brown". Garnish with Parmesan cheese, if desired.


I like to eat. A lot! I like big portions, which is probably my #1 battle when it comes to weight loss. It bugs me deep down to my core to just have soup as a meal. Soup is a side to be paired along with a sandwich or an appetizer to a dinner. Soup can never be just the meal. See what I mean? If I am to change this body, I need to change the thinking. Tonight's dinner was just the soup. I had a large lunch which consisted of a  veggie parmesan sandwich that came with fries, so I rationalized that I could handle just soup for dinner. OK, I did add one slice of buttered (margarined) toast with it. This soup really is meant to be a meal. It was absolutely delicious and filling. I will confess to going back for seconds. I especially liked the carrots! Maybe next time I make it I will add a third carrot to the mix.

I did cheat a teensy tiny bit on this Meatless Monday thing with this soup. I only had 3 cups of vegetable broth left in my freezer, so I used a cup of chicken broth make up the rest. Since I do not claim to be a vegetarian and I did not use any new meat to make this meal I will let it slide. Plus the chicken broth was made as to not waste any chicken pieces or vegetables, so in all it was beneficial. I also left out the sugar that the recipe called for. With so many other delicious ingredients, I didn't think the extra sinful ingredient would be needed. Definitely not! This soup was absolutely delicious. Even Sophia thought so! She was literally raving to me about how tasty it was. I never get too many rave reviews from her, as it is usually a struggle to get her to eat a decent portion, but she loved it!
"Woah!" So I ask, whats up? "My belly says its yummy!"
"Mom, I'm not even gonna lie. This is really good."
"I like this soup to 100."
Those are only some of the quotes from her. Tortellini is probably one of her favorite pastas. I don't know why she loves these little cheese filled circles more than even the cheese filled squares of ravioli. I don't cook them too often, but anytime we have them, she gobbles them up. She ate all the tortellini's out of the soup before she started working on the rest of it.

There was only one problem with this soup. Being mainly liquid based in the pressure cooker, when I performed the required quick release, not only steam rushed out of the escape hole. It started spewing hot drops of soup right out the top! I had soup all over the front of my cabinets and all along the counter tops. When I realized this was happening, I held a paper towel over the hole in an attempt to catch the flying drops, only to burn my fingertips. I will definitely be making this soup again at some point, so I am contemplating allowing it to perform its own natural release for a while before letting the extra pressure escape. I am scared this method will make the tortellinis cook too much and become mush. In the mean time, I was able to clean the mess up quickly with a damp sponge before it dried. Not too much harm done....

Sunday, November 27, 2011

Officially Christmas Season!

It is officially the Christmas season and I love it! As much as a can seem to be a scrooge about Christmas before Thanksgiving, I really do love it. I just with people could wait for Thanksgiving season to be over to start the Christmas celebrations!

This weekend, my family and I kicked Christmas off right! We set out of Philadelphia towards Reading. Along the way, we drove through Lancaster and saw how the Amish lived. I was super excited to see a Sheetz, though I did not have the chance to go in :( Sheetz is very much like a Wawa. Most Philadelphia locals would kill me for saying it, but I would prefer to have a local Sheetz over a Wawa. While in Amish county, we went to Shady Maples for a Smorgesbord breakfast. After breakfast we continued along to Reading to the hotel my mother got us for the night. Once it was dark we set out to Koziar's Christmas Villiage. The adventure to the Christmas Village was a bit more exciting than the actual light show! My mother's GPS showed us an off the beaten path way to get there. When I say "off the beaten path" I mean not even paved at some parts. This road did take us around all the traffic waiting to get in and gave us some good laughs (while my sister was having heart palpitations over the fear of what we would find in the woods we were driving through). The lights at Koziars were very nice, but it was way too crowded for my liking.

This morning, we decided to take the drive to Hershey. We didn't do the rides or drive through the light show, but we had so much fun. We stuck to the indoor attractions in their chocolate world. There was a 3-D movie which was amusing for the kids as well as historically educational for the adults. Then we went on a ride through the tour of the factory. The original factory was closed in 2010, so they have a 10 minute ride on tour of a simulated process of making the chocolate. My brother and I are debating whether the new chocolate factory is in West Hershey or Mexico. I'd like to think it moved just across town instead of out of the country. After the tour we did some shopping and then made our own candy bars. This process was way different than what I thought it was going to be, but I was very pleased with the results. Everyone was able to pick their type of chocolate and fillings; then watch it me made through the machines. Then we were able to design a label for our bars. We then had lunch in the cafeteria area. Little did we know, Santa was there and available for pictures!! We got a big family picture with my sister and brother plus all the kiddies. After some bribing, Sophia agreed to sit alone with Santa for a picture. I had to buy her a special treat. Luckily I got away with a personalized Hershey Kiss magnet. It really was a great weekend. I spent no time cooking, but it was worth it. I picked up some dinner at Wawa tonight, though I am still craving Sheetz. One food fact I learned about myself this weekend: I really do not like scrambled eggs at all anymore. Over medium or poached is the way to go, for me.


Friday, November 25, 2011

Sweet Potato Biscuits

  • 1 1/4 cups whole wheat pastry flour
  • 1/2 cup white flour
  • 2 tsp baking powder
  • 1/2 tsp salt
  • 3 Tbsp margarine
  • 1/3 cup apple juice
  • 1 cup cooked mashed sweet potato
  • 3 Tbsp honey
  • 1/2 cup finely chopped walnuts
Preheat oven to 425. Sift together the flours, baking powder, and salt in a mixing bowl. Work in the margarine until mixture resembles coarse meal. Add apple juice, sweet potato, honey, and nuts. Work them into a soft dough. Turn the dough out onto a well floured surface and kneed in just enough flour to make dough lose its stickiness. With floured hands, divide dough into small balls and arrange on a lightly greased baking sheet. Pat the top of each ball to flatten it slightly. Bake 12-15 minutes.


I probably will not ever make these biscuits again. This was the recipe I was most excited to make for Thanksgiving, yet it turned out the worst. While kneading out the dough, no matter how much flour I added it remained very sticky. I am assuming this is because of the honey, but who knows. All I know is I had the dough stuck to every one of my fingers and no amount of flour made it better. This stickiness made shaping them into balls impossible so I wound up just plopping them onto the baking sheet, which resulted in a not so nice looking result. The flavor left a lot to be desired. I don't know if it was the amount of flour I tried to use to make the dough less sticky, but they were very bland. This is definitely not going to be a repeat.

Thursday, November 24, 2011

HAPPY THANKSGIVING!!!!!!!


The comics are my favorite section of the newspaper!

Pumpkin Pie


This is a Thanksgiving staple! Who could host Thanksgiving without a Pumpkin Pie? It is probably the second most important food item after the Turkey. I am not hosting dinner this year, that is something I hope to never do. It is too much for me. My wonderful sister, who I am most thankful for, is hosting dinner at her house. I am bringing pies (only the pumpkin is homemade, the others I get through Sophia's dance class fundraiser), homemade cranberry sauce, and sweet potato biscuits. This is my favorite holiday, probably because it includes most of my favorite foods and it comes with a free pass to eat all I can. And I can eat!! Last night, my trainer and I decided I'm going to attempt to lose close to 20 lbs, so this will also be kind of a last hoorah! HOORAH!!!! God, am I corny.

  • A pie pumpkin (small round and about 6-8 inches)
  • 1 cup sugar
  • 1.5 tsp ground cinnamon
  • 1 tsp ground cloves
  • 1 tsp ground allspice
  • 1/2 tsp ground ginger
  • 1/2 tsp vanilla extract
  • 1/2 tsp salt
  • 4 large eggs
  • 1.5 cans evaporated milk
Crust:
  • 1.5 cups flour
  • 2 Tbsp sugar
  • 1/2 tsp salt
  • 1/6 cup (1 oz) cold vegetable shortening (breaks down to 2 Tbsp and 2 tsp)
  • cold water
To make crust: Mix flour sugar and shortening first. Do not make it too smooth, try for pea sized granules. Sprinkle in some cold water to make it dough consistency. Roll out dough between two pieces of wax paper. Use some flour to keep it from sticking. Remove top piece of wax paper and flip dough into pie pan and shape. Press into pan and seal any broken areas. Remove wax paper before filling.


Make Pumpkin Puree with the pumpkin. Mix all pie ingredients. Pour into pie crust. Cover edges of crust with foil to prevent burning. Bake at 425 for the first 15 minutes then turn down to 350 and bake for 45 to 60 minutes. When a knife comes out clean, the pie is done.


Crust protectors are available for purchase at kitchen supply stores.
Or you could do this.
So what recipe would be complete without a disaster or two? I had to run around to 3 different places Tuesday night to find a pie pumpkin. Everywhere has all their Christmas stuff up, but right when everyone should be giving thanks and making pie, I couldn't find a damn pumpkin! I eventually did find one, but next year I will be pureeing some pumpkin at Halloween time and freezing it for Thanksgiving. My last resort would have been mixing the bit of puree I have in my freezer with some of a can, but as you know, I am not a huge fan of the shortcuts that are infused with crap.

As I was mixing my pie ingredients I accidentally poured a bit more than 1 and a half cans of evaporated milk into the mix. Since other ingredients were already in the bowl, there was no way of sifting the extra out. The filling looked very liquidy and as it is my first time I was not sure if it would solidify correctly. I added a tsp of corn starch to thicken it up a little. It looks to be OK...keeping my fingers crossed for the final taste test.

I really hope my pie turned out delicious. I have not tried it yet, since I can't cut into it until dinner is done this afternoon. This post will probably be updated once I get everyone's reactions. The pie ingredients made much more filling than would fit in the crust. Instead of wasting it, I decided to make Naked Pumpkin Mini's. Aka: Cupcake sized pies with no crust.


Family Reaction: Just about everyone seemed to like my pie. The filling was pretty delicious. I was scared it would be too clovey, but not at all. My brother in law said it was too moist for his preference, which could have been due to my over pouring of the evaporated milk. I didnt like the crust. It seemed a bit chewy or soft or something. I am going to look into a new recipe for pie crust.

Wednesday, November 23, 2011

Cranberry Sauce


I am going to share two cranberry sauce recipes with you. I originally was going to do the recipe I found in my pressure cooker book, but then I found one that was less calories for the crock pot. So I decided to use the crock pot, until my week got really busy. I have no time to sit around for a 7 hour recipe, especially since the last two hours of cooking are a little more hands on than most crock pot recipes. I decided to combine the two, using the ingredients for the crock pot but the time instructions for the pressure cooker. Doing this blindly and hoping for the best, basically.

Pressured Cranberry Sauce:
  • 12 ounces fresh cranberries (about 3 cups)
  • 1 cup sugar
  • 2/3 cup water
  • 1 tsp orange zest
Combine all ingredients in pressure cooker and stir. Securely lock on lid an cook on high for 6 minutes. Let the pressure release naturally for 5 minutes before performing a quick release. Stir sauce, smashing cranberries until the sauce is your desired consistency. Let sit an additional 5 minutes to firm slightly before serving warm. Refrigerate a few hours or overnight if you prefer to cold cranberry sauce.

Skinny Crocked Cranberry Sauce:
  • 12 ounces fresh cranberries
  • 1/2 cup orange juice
  • 1 cinnamon stick
Combine all ingredients in the crock pot and cook on low 4 to 5 hours, until berries are soft. Remove lid and cook on high 2 to 3 more hours. Removing the lid allows the cranberries natural juices burn off. Stir occasionally. Chill in fridge overnight.


I used the ingredients for the crock pot recipe and used the instructions for the pressure cooked recipe. I also added 1/2 cup of water, because more liquid is usually needed to cook in the pressure cooker. I doubled the recipe, because I love cranberry sauce and I wanted to make sure there was enough for me to have some leftovers! We will also be having the jelly kind from the can, because I do love that as well! I don't think I have ever actually had real homemade cranberry sauce.

The texture of the sauce looks great. It was way too tart though! Real cranberry sauce is supposed to be tarter than the canned stuff, but this was too much for me. I had to add about 4 tbsp of sugar. Lesson learned: Thanksgiving is not the time to be worried about "skinny" recipes!

Monday, November 21, 2011

Stuffed Sweet Potatoes


  • 2 large or 4 small sweet potatoes
  • 1 can black beans
  • 1/2 onion, diced
  • 1 bell pepper, diced
  • 1 cup salsa
  • 1 cup frozen corn
Preheat oven to 400. Wash potato and puncture all over with a fork. Bake until soft, anywhere from 45 minutes to an hour and a half. Saute onion and peppers. Drain and rinse beans and add to peppers and onions. Sprinkle with salt and pepper, then cook on medium low. Add salsa and frozen corn. Stir well. When potatoes are ready, cut and fluff them. Top with bean mixture. Serve with extra salsa, butter, sour cream, or shredded cheddar cheese.


Yummy! It is like Mexican sweet potato. I served it alongside green beans, as you can see. I also wanted to do some rice, but ran out of time and I was too hungry to wait. The rice wasn't needed though. I wound up eating a potato and a half smothered with deliciousness. I topped mine with margarine, the bean mixture, sour cream and shredded cheddar cheese. Probably not the most healthy way to go, but with a plate full of veggies I'm going to tell myself it was OK. The black beans made this very filling and the flavors together were absolutely delish! As an entree or a side dish, I will definitely be making this again!

When I served Sophia her meal, I gave her the sweet potato separate from the filling. She ate up the sweet potato and green beans, but the filling she had a bit of a problem with. She told me it was too spicy, even though it was not spicy at all. I think she gets scared of beans. We know she does not like baked beans (I don't either) so I think she associates other beans as tasting like them. She has had beans in meals that she liked. Most of the time I don't tell her she is eating beans until after she eats them. When she asks what is on her plate, I just tell her its a vegetable. Gotta keep chipping away at those finicky little taste buds!

My girlfriend Melissa came to dinner tonight. She is one of my favorite people to cook for, as she is such a great audience! She loves to eat and is so appreciative of my meals. Plus she is a very adventurous eater, so she will try anything. My meals can't even touch some of the exotic things she has told me she ate. Congealed pigs blood anyone? When I eventually try my beet soup recipe, she will be my Guinea pig. She was a huge fan of this meal! Sometimes it is so nice to have someone cooking my meals that wont argue with me to compromise on how many bites they must eat. It is extra special when I am not the only one going back for seconds!


Misa Misa and the Little Miss on the beach this past summer.


Sunday, November 20, 2011

Cheesy Baked Ziti


  • 1 lb ziti, cooked and drained
  • 15 oz ricotta cheese
  • 8 oz mozzarella cheese
  • 1 egg
  • 1 tsp salt
  • 1/4 tsp ground pepper
  • 31/2 cups sauce
  • 1/4 cup Parmesan cheese
Mix ricotta, mozzarella cheese, egg, salt, pepper, and 1/2 cup sauce. Gently fold in ziti and stir until well coated. Spread 1/2 cup into the bottom of a baking dish. Pour ziti mixture evenly in dish. Top with remaining sauce and sprinkle with Parmesan cheese.
Bake at 375 for 30 minutes. Sauce should be bubbling and top should be browned. Let stand 10 minutes before cutting.


I wound up tripling this recipe. Today was my youngest nephew, Christopher Gregory's Christening. We had a luncheon party at my sisters house, so members of the immediate family each brought a dish. We also had ham, roast pork, and chicken de van (a recipe I need to convince my sisters mother in law to share!). This recipe is so simple to make. The only change I would make is adding some more sauce into the cheese mixture. I am a huge fan of sauce, so it is really just a matter of personal preference. I wanted to make homemade ricotta cheese for it, but I needed a large amount and just didn't have the time. Everyone seemed to enjoy this ziti, I would definitely recommend making it when hosting a party.


Christopher Gregory - Today's Main Man


Friday, November 18, 2011

Acorn Truffles


Well these turned out a mess. I never claimed to be a master decorator. That is why I have my sister. She does beautiful custom cakes as a little cottage industry. Eventually I may be sharing some pictures of her creations. Anyway, I am not her. That is why my chocolate coatings turned out looking like crap. I think the one right in the middle looks the most like an acorn.

  • 16 oz package chocolate chip cookies
  • 1 package cream cheese
  • 1 package chocolate chips/morsels
  • 1/2 tsp vegetable shortening
  • 1/2 cup finely chopped pretzels
  • Mini pretzel rods cut in half
Line baking sheet with wax paper. Crumble cookies into food processor and process until mixture resembles coarse meal. Fold into cream cheese until it holds together. Roll into 1 1/4 inch ovals.
Microwave morsels and vegetable shortening 30 seconds. If not fully melted continue to microwave in 10 to 15 second increments until fully melted. Dip truffle in the chocolate to coat and then dip one end into pretzel pieces. Insert mini pretzel rods in top. Refrigerate 30 minutes.


I had originally planned this recipe as a fun activity to do with Sophia and her friend Ava. The kids were so excited to do a special treat project, until it was time to actually do the project. They decided they were having too much fun to stop running around, so I went at it alone. I made such a mess! I tried using my blender to process the cookies. No such luck. I think it actually started smoking. How many days till Christmas, when Santa brings me a new one?? I wound up putting the rest in a large Ziploc bag and crushing them. That is also what I did to finely chop the pretzels. Coating the balls was a project in itself. My fingers were covered with chocolate! Once the balls were covered it was hard to pull them out of the melted chocolate, because they would smush if I got a tight grip on them. The recipe said it was going to yield 36 acorns, but I gave up after my first tray was full. They did wind up delicious and pretty festive looking. Definitely something I would like to eat again. I may just pass this on to my sister to see if she can possibly make them a bit more pretty looking...


PS... the first step of my original recipe was "Preheat oven to 350." Then at no point in the rest of the recipe does it say anything about baking these little guys. Beats me...

Thursday, November 17, 2011

Chicken Pot Pie Casserole


Filling:
  • 1 bag mixed veggies
  • 2 cups cubed chicken, cooked
  • 1 can condensed cream of chicken soup
  • 1 cup milk
  • 1/4 cup pancake mix
  • 1/4 tsp ground black pepper
Crust:
  • 1 cup pancake mix
  • 1 cup water
  • 1 Tbsp parsley
  • 1/2 tsp dried rosemary or basil
To make the filling: Whisk together soup, milk, pancake mix, and ground pepper. Combine with chicken and veggies in a skillet and cook over medium heat for 4-5 minutes, stirring occasionally. Pour into a 2 quart casserole dish.
To make the crust: Whisk together pancake mix, water, parsley, and rosemary or basil. Slowly pour an even layer over the chicken mixture.
Bake 30-35 minutes. Cool for 5 minutes before serving.

This was another recipe I found on food packaging. This recipe came off the side of a box of pancake mix. Chicken pot pie is a great comfort food, so I was super excited to make this. The prep work is really not all that hard and most of the cooking time is baking (hands-off!). Not sure if you have caught on yet, but I tend to change some aspects of most of my recipes. The original recipe called for a mixed bag of cauliflower, broccoli, and carrots. Great mix of veggies, but I felt the pieces would be too big for my idea of a pot pie. I have always had pot pie with smaller, more bite sized vegetables, so I figured a bag of frozen mixed veggies would work.

As promised, I will share with you my mini disaster. I decided to take a nap before I made dinner. I am so luckily to have a child who will allow this (for the most part). I am a very heavy sleeper, so when I wake up I am usually in a fog, for a bit. I glanced over the recipe last night to make sure I had all my ingredients on hand to make the pot pie. So as soon as I got up from my nap, I started cutting my chicken and combining my filling ingredients. Only when the filling ingredients were all together did I notice the chicken was supposed to be pre-cooked! I am hoping if I didn't catch this huge blunder, it would have cooked in the oven while it was baking. Maybe? Not really sure, though raw chicken is one monster I do not like to mess around with. Easily fixed (semi)-disaster. I scooped out the chicken from the mixture and plopped it in another pan to cook it up real fast. After that was finished, it was pretty much smooth sailing.

This was a pretty good meal. The crust was not one that I would imagine a pot pie to have. Texturally, I would have preferred a more flaky crust. The herbs used made it delicious, I opted to go with basil.

I probably wouldn't jump to make this again right away, but I think it could be a great idea to use leftover chicken and vegetables. It seems to be a pretty easy recipe to cut in half. Also, I think you could run with it as a guideline for some other variations. I thought maybe using cream of mushroom soup with beef cubes and chopped up pepper, onions, and carrots? Or switching out for cream of cheddar soup for a bit of a different taste with the chicken. Get creative. Let your mind wander. Experiment. You won't know if you like it, until you try!