Wednesday, December 28, 2011

Bean and Ham Soup


This soup came to fruition through a happy mistake. I hosted a holiday pot luck get together for my girlfriends. As the host, I decided to make a ham and have everyone bring sides. We decided to have this dinner on a weeknight, as to not conflict with anyones previously planned family parties. All was fine and good until I went and got hired for a full time job. I wasn't going to be home from work with enough time to make my ham. After researching a few recipes, I decided to put my ham in the crock pot while I was working.

I will never do a ham in the crock pot again! All my ladies said it didn't taste bad, but I was completely disappointed! My ham turned black after sitting in the crock pot all day. I had used a can of pineapples and honestly I forget what else to flavor the ham while it cooked. My sister's theory is the sugar from the pineapples turned the ham dark. I don't know if I am buying it. All I know is I will never do a ham in a crock pot ever again. If any of you that are reading this have managed a successful crock pot ham, could you comment and let me know how you did it?

As much as I was disappointed in that ham, I could not let it go to waste. My friends and their kiddos did eat some and noone complained about the flavor, but I think they were just trying to be nice. I was left with a large portion of ham as leftovers. I saved it, along with some leftover corn, to make a bean soup. As much as I did not like the ham, I didn't want to waste it. So back into the crock pot went the ham.

To transform this ham from dull dark brown mess to delicious soup, I added:
  • 2 cans pinto beans, rinsed and drained
  • 1 can chick peas, rinsed and drained
  • 1 can kidney beans, rinsed and drained
  • about 2 cups corn (leftovers)
  • 3 cloves of garlic, minced
  • 4 cups vegetable broth
  • 3 carrots, diced
  • 1 onion, diced
  • 1 bay leaf
After I stirred all the ingredients together, I set that baby on low and let it cook about 8 hours.

This soup is very hearty and filling. I am normally a big eater, but a small bowl of this soup along with some spinach salad stuffed me. I have not tried to give this to Sophia yet, as I have been packed it for lunch at work, two days in a row. My sister took sample, so hopefully soon I will see what she thinks.

Tuesday, December 27, 2011

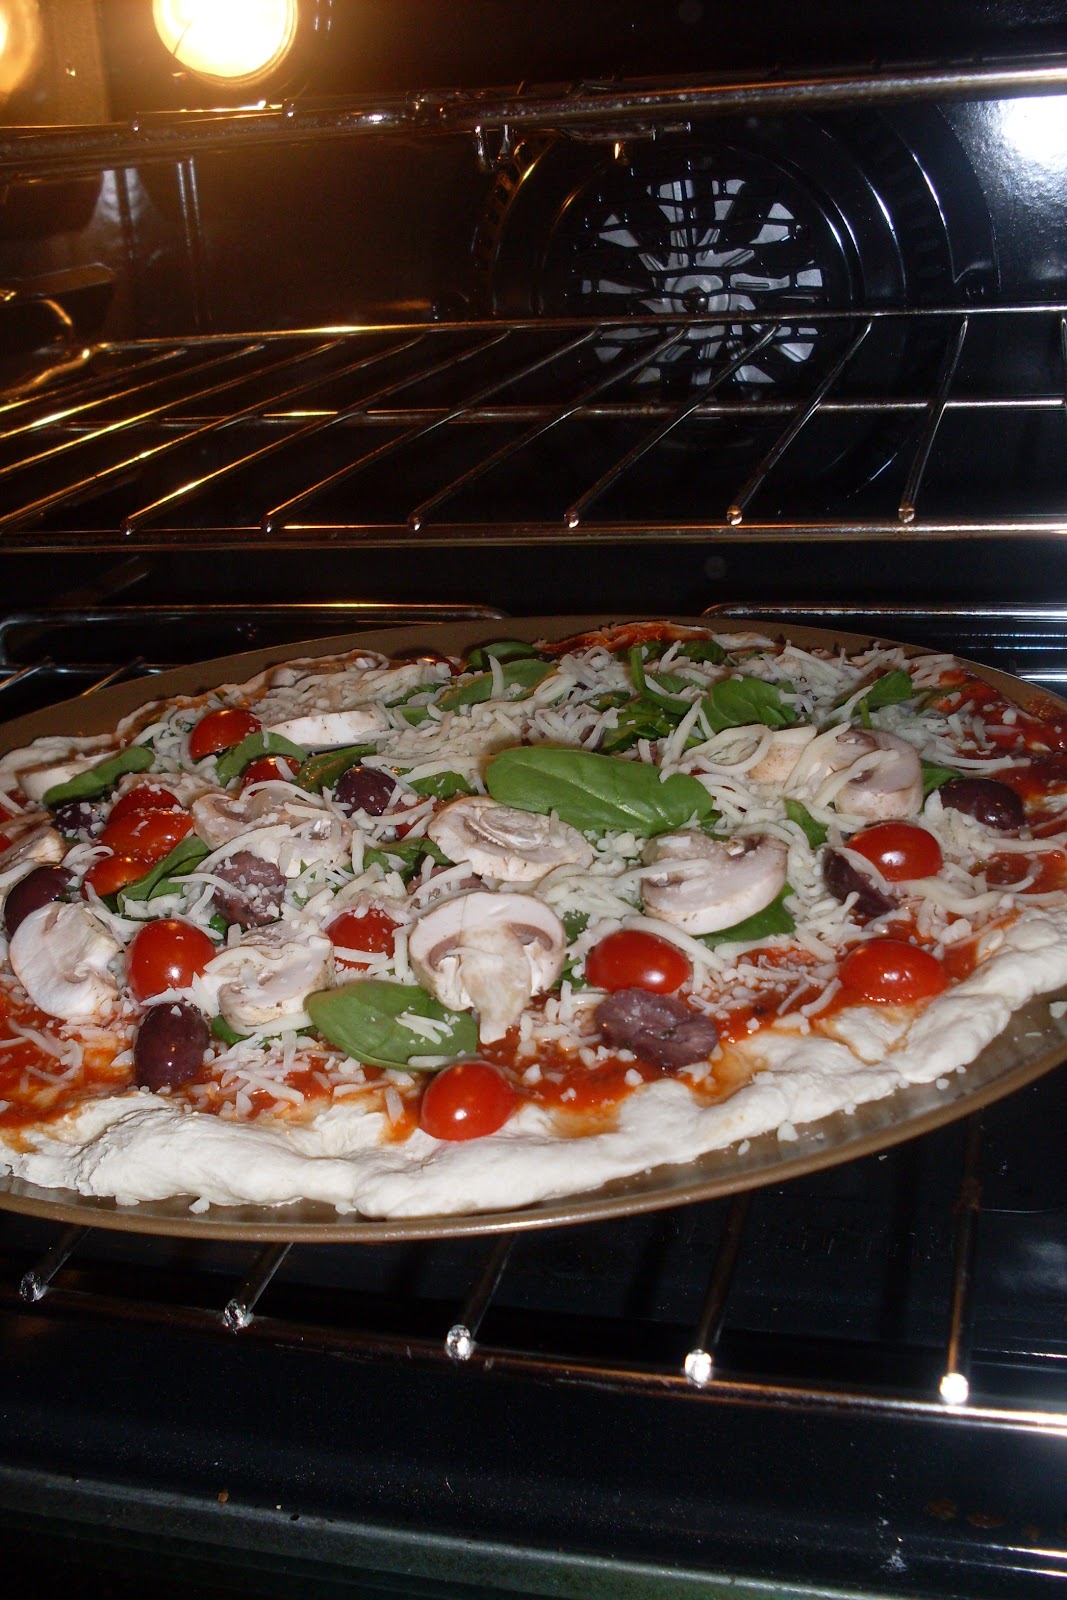
Veggie Pizza


Ive been getting a bit bored with the "experimental" vegetarian dishes. Plus, the holidays exhausted me so much, I wanted to do a Meatless Monday recipe that was pretty simple. When I originally decided on doing a veggie pizza, the plan was to buy one of those premade crusts from the store and going from there. As everyone can tell by now, I don't like to take those premade short-cuts very often. As I researched pizza crust recipes, I found one that could be made using all ingredients I had at home already. Score! This recipe is one of the few that I found not using yeast. I believe this makes the crust gluten free, though I am not sure how the all purpose flour works into that category. If you are allergic to wheat, please do not take my word on the fact that this pizza is gluten free. Anyone who is allergic would obviously know what to look for better than myself, but just to be safe....please do not trust my judgement!! I also do not know if any of my toppings could be considered gluten free either. It is not a subject I am well versed on, since I do not know anyone who is affected by a wheat allergy (knock on wood).

  • 2 1/4 cup flour
  • 2 3/4 tsp baking powder
  • 1 tsp salt
  • 1 cup water
Mix dry ingredients. Add water and oil. Stir until it forms a ball. If dough is stiff, add a little more water. Kneed for 3-4 minutes on a well floured surface. Spread thin on a pizza baking sheet. Bake on 400 for 5 minutes. Top crust with preferred toppings and bake for an additional 15-20 minutes.


OK....big oops!! I completely forgot the oil when I made this last night and didn't realize until I was copying the recipe that I had done so. Though my big oops could really be a little oops since the pizza came out fabulous and no one thought there was anything missing. Maybe I will leave out the oil from now on to cut some calories. I will probably try it at least once with the oil to see if there is much of a difference, but this blunder was really no biggie!

Spreading the dough out thin took alot of patience. My kitchen is lacking in some supplies and I do not know what I need until the very moment that I need it. Last night I realized I need a rolling pin and a pizza cutter. I kneaded the dough thin by starting in the middle and working my way out in a circular fashion. This would have been way more fun if I had the skills of a professional pizza tosser. Sadly, I do not so I was reprimanding my dough anytime it would tear even in the slightest.

Once the dough is baked for its preliminary 5 minutes, it is ready to be topped! You can top a pizza with just about anything under the stars, as I am sure you already know! With such a simple crust recipe made from kitchen staples, this would be a great meal to make when you have not planned anything or for those days when you desperately need to go food shopping and just don't have the motivation. No sauce handy? Use some garlic and oil to make a white pizza! No cheese? Tomato pie! Add any combination of meats and/or veggies that will tickle your taste buds. I probably have never been so excited over eating pizza. The take-out menu places just can't compare to my fresh pizza made in my own oven.

This was a great meal to have Sophia get involved in. Since I did plan ahead, we decided what toppings we wanted and went to the market to pick them up. Sophia decided she needed spinach. For such a picky eater, I seem to have the only child in the world who hates french fries but loves spinach. Not complaining, but I can not figure that one out! I wanted a bit more on my portion of the pizza. This pizza wound up being LOADED with fresh veggies and cheese! I had spinach, olives (not the canned kind, the good ones!!!), sliced grape tomatoes, and mushrooms. Yum! This reminded me of a fancy bistro style pizza. Definately not the greasy mess you can have delivered.

We invited my friend Krystle to come over and make pizza with us, so she managed to get some great pictures of our evening! They got all jumbled out of chronological order, which bugs my eyeballs, but you get the idea. I am not necessarily the most tech savvy person out there.


Monday, December 26, 2011

Baked Eggs with Tomato and Green Pepper


Have you ever baked an egg? I have not. I have scrambled, fried, and baked USING an egg, but I have not actually ever baked an egg. Who would ever think of putting an egg in the oven as a main ingredient to a dish? Surely not I! Until now!

This was the first Christmas that Sophia and I did not live at my parents house. I cannot imagine what Christmas morning with just my parents and younger brother was like at their house. My mom had asked me if they could come here to see Sophia open her presents and while I completely understand wanting to experience that joy and magic of Christmas morning through a child's eyes, I did not allow it. I was excited to have a special morning with my baby, plus I didn't think it would be fair to make Sophia wait until guests arrived to open the gifts. Since I was little, the first child awake would wake the whole house and the gift opening would happen immediately. However, I did make Sophia wait for me to brush my teeth and make a cup of coffee before beginning. Lucky for her, we have a Keurig which takes about 30 seconds to brew. I invited my parents to join us for a Christmas breakfast so we could have some quality time together before we all headed over to my sister's house for dinner.

I knew I wanted to make my apple-cinnamon pancakes and serve pork bacon. The apple-cinnamon pancakes are made by adding my homemade applesauce to the pancake batter, easy peasy! I very rarely buy pork bacon. For health reasons and taste preferences; if I cook bacon, it is always turkey bacon. My mother is not a big fan of the turkey variety, so I wanted to treat her to some pork. Then I stumbled upon baked eggs while browsing Pinterest. Every recipe I found told me to crack an egg into a muffin pan over top of some diced up veggies. The pictures with the recipe show the final product looking like a sunny side up egg. I like to eat eggs over medium, but my mother will not eat anything runny at all. This recipe seemed so convenient, since I could cook them in the oven while concentrating on the food I had going on the stove. I decided I would beat the eggs so they would bake scrambled or omelet style. I used 10 eggs and added diced green peppers, diced tomatoes, and half a very finely diced onion. I sauteed the veggies before I added them to the egg to enhance the flavor and so they were not too crunchy. I poured the mixture into a muffin pan and let it bake on 350 for 20 minutes. If you are doing these scrambled styled, like I did, you can check for doneness the same way you would a cake. A butter knife will pull out clean if cooked completely.

These eggs were a hit! The 10 eggs filled up 12 muffin cups, so each little egg circle came to a little over one egg. I'm guessing you could make fewer eggs stretch if you beef them up more diced veggies or maybe even some bacon or sausage. They are like mini omelette's without the tricky flipping (or fattening oil) involved. Double bonus: I had leftovers to eat for lunch for today's Meatless Monday!!


My brother, Mother, and me in my kitchen Christmas morning.


Just a little Christmas funny. This cracked me up when I read it.

Monday, December 19, 2011

Onion Soup


I have crossed over to the dark side. I finally found a job after searching for 8 months!!! Yay, for me! Now, my story continues as a full time working mother. Meals will still need to be planned on the cheap and "waste not, want not" will always be my motto! I have figured out my New Years resolution this week as well. Though I already am a bit nuts about recycling, I plan to reuse more of the products that come into my home. An environmental science teacher told me once that reduce, reuse, recycle is stated in the order of appropriate actions. Reduce the amount of products you use and consume, reuse whatever you can at all times, and recycle anything that is left. It is a dream of mine to own a home with a garden outside and a compost pile to use all the scraps that are not able to be tossed into a "broth bag". I'm a green thumb with big dreams! I always feel my supply of Tupperware is completely lacking, so I decided my first step in this reuse process will be to save glass and plastic jars. They can be washed after original use and be used to portion out my homemade vegetable broth, which will then be frozen. I will also use them for single serving lunch portions to bring to work and to freeze leftover soups or sauces. Here I go, getting off track, when I haven't even jumped onto the track of intended conversation....my onion soup.

As my first day of real work in a long time, I was nervous that I would not be able to provide a nice meal for Sophia and I. Plus the added pressure of Meatless Monday (as much as I love it, Mondays take a lot of planning and prepping to go meatless), I needed to figure out what I could toss into my crock pot. In order to save myself a trip to the food store, I had to work with what I had. The main vegetable I had on stock was onions. I had a whole bag of onions for some unknown reason. Most likely I needed just one for a recipe, but buying a while bag was more cost efficient. Onions will never go to waste, especially when they can be frozen for broth. As much as I love it, I knew I was not going to be able to do french onion soup, because I don't have bowls heat resistant enough to put under the broiler, but I researched french onion soup recipes to gather some ideas of how I should do this.

Even though I was looking for the simplest directions possible for crock pot onion soup, every single recipe I found instructed me to caramelize sliced onions before cooking them in soup. So there I was this morning, awake extra early and cutting onions to caramelize onions in a skillet. I sliced up 5 onions and cooked them over medium heat with half a stick of butter. All the recipes I read also told me to be patient with the caramelizing process. It took about 20 minutes. Part of me wished I had thought to slice and caramelize the onions before I went to bed, but oh well....maybe next time I will think ahead. I let the onions cook as I got dressed and brushed my teeth. I also sliced up two carrots to throw into the crock pot once the onions were ready. So I did just that. I loaded up the crock pot with the cooked onions, the raw carrots, 3 cups of vegetable broth, some Worcestershire sauce, a bay leaf, and some rosemary. Three cups of broth seemed to be enough to cover the onions with liquid, but not by much as to not make the soup to liquidy. The recipes said to use beef broth, but I had my vegetable broth in the freezer. Plus it is Meatless Monday, so the beef broth could be frowned upon. (Mind you if I only had beef or chicken broth in my freezer, that is what I would use. I love the idea of Meatless Monday and I try my best to stick to the rules, but I am not going to run out and buy vegetable broth if I have a homemade substitute in my freezer.) After adding about 3 Tbsp of Worcestershire sauce and the other seasonings I've mentioned, I set the crock pot to low and went on my merry way.

The soup turned out to be just what I wanted. I probably added too much butter in the process of cooking which didn't seem to add much buttery flavor anyway. Next time I try onion soup, I will try to leave the butter out for healthy, skinny momma reasons. Served along with grilled cheese, I guess I did have all the elements of my favorite french onion soup, just as separate components. Maybe I didn't need that cheese either, but a girl has to eat! Sophia is a huge fan of dipping grilled cheese into any sort of soup I serve it with. She did eat some of the soup alone, but stuck mostly with the dipping of her sandwich. For a picky eater, she surprises me when she will eat onions. She will not eat them raw (who does? yuck!), but she definitely does not turn her nose up to a cooked onion. It is like a little ray of hope concerning my child's tastes.

Sunday, December 18, 2011

White Trash


I have not made Christmas cookies since I was a little girl. This year I wanted to do them so I had some deliciousness to hand out to people and so we had something homemade and fresh to leave out for Santa. Not that Santa needs any cookies in her belly this year, but its all about the memories for Soph. She was not very interested in helping with the cookie process, but she definitely likes being my taste tester! This year I made 4 types of cookies: Russian Teacakes, Oatmeal, Potato-chocolate chip, and White Trash. I had white trash only one time before now, when a co-workers wife made them for the holiday party. My supervisor was raving about it before they came in, so I needed to try them. As a salty/sweet kind of girl, I fell in love. Forget the other cookies, this was all I needed! Ive had the same reaction with my batch of white trash. Everyone loves it, plus they get a kick out of the name!

  • 9 cups non-sweetened cereal
  • 2 cups pretzel sticks, broken into halves
  • 3 cups peanuts
  • 2 - 12oz packages of white chocolate chips
Melt the white chocolate chips in the microwave for 1 minute. Continue to cook in 10 second increments until melted smooth. Mix cereal, pretzels, and peanuts in a large bowl. Gently fold white chocolate into the mixture. Once the mixture is evenly coated, spread onto a wax paper covered surface and let dry. Break into bite sized pieces.

This was so simple to make, especially since there is no baking involved. I used a mixture of Chex and Cheerios for my cereal. The hardest part was folding the chocolate into the mixture.
Once it was dry, I used a spatula to separate and then break into pieces. While I may mix my cookie variety from year to year, I have a feeling white trash will become a yearly tradition coming from my kitchen.

Thursday, December 15, 2011

Spaghetti and Clams


This dish is literally the only dish I will eat with clams. Frankly, clams disgust me. I don't know exactly what it is. I'd like to think it is the texture, but I love mussels so that cant be it. I grew up with my mother making this dish. The few times I have tried it before tonight; I never followed a recipe. I thought it was basically olive oil, canned clams, and minced garlic that made this dish. Boy was I surprised when I got curious enough to search for a recipe and found one with 7 ingredients.

  • 1/2 lb spaghetti, cooked
  • 1/4 cup butter
  • 1/2 cup chopped onion
  • 3 garlic cloves, minced
  • 2 - 8oz cans clams, drained with juices reserved
  • 1/4 cup parsley
  • 2 Tbsp olive oil
Melt butter in a large skillet over medium-low heat. Stir in onion and garlic. Cook 5 minutes. Add clams and stir for 3 minutes. Add water to the reserved clam juice to make 2 cups of liquid. Stir in parsley, olive oil, and clam juice mixture. Increase heat to boil, then reduce to a simmer. Cook covered for 15 minutes. Toss with spaghetti.


I was very pleased with how this turned out. There was definitely more flavor than my old way of making this dish. This proves every old comforting dish can be experimented with and even tweaked into a new favorite! I loved how easy this dish was. It seems as if there were alot of steps involved, but really it was not bad. I made the sauce as I boiled water and cooked the pasta. It took less than a half hour to complete!

I did not attempt to feed this to Sophia. My sister and her boys came over tonight for some traditional holiday fun, so we fed the kids some pizza. Both my sister and I did have seconds. She justified her seconds, because my bowl was bigger than hers. I justified my seconds, purely because she went for seconds.

Each year we get together to decorate gingerbread houses and trees. We plan for it to be a fun activity for the kids, however we usually wind up taking control and not letting the kids have much say in the decorating. They like to run around together. Whenever they pop their heads up to the table, they wind up shaking the table and eating the candy. It is nice to have tradition. One thing that has become tradition is each year on gingerbread night, we wind up with a Christmas catastrope. Our first year, Santa came to visit and the kids were petrified. He rang the bell and as they peeked out the window they ran screaming their heads off into another room. Last year, my sister was devastated because the kids wound up knocking her tree over and shattering most of her glass ornaments that she had been collecting since she was a teenager. This year our meltdown came for Sophia. We have an elf on the shelf in our household. His name is Scott. The one rule of all elves on the shelves is there is no touching allowed. Touching means the elf will lose his magic and cannot report back to Santa. My 3 year old nephew, Collin has an elf of his own but does not buy into the story. He touched his own elf yesterday and tonight he touched Scott. Sophia was heartbroken! We wrote a letter to Santa to ask for Scott to have his magic back since she was not the one that touched him. Luckily Santa is fair and allowed Scott to come back with his magic in tow. I don't know what I would have done if Scott could not be in our household at Christmas time. We love that little guy!


Swedish Baked Potato


This is the first recipe I have tried that I found on Pinterest. It was so simple to do. The flavor is pretty much like a regular baked potato, but I feel like it took less time to cook. Also, I like that I didn't have to use tin foil to wrap the potato. Less waste is best in my book!

To prepare the potato, simply slice the potato all most all the way through. You want to leave a little bit on the bottom uncut so the slices don't come apart. The recipe I had suggested slicing a garlic clove and putting the slices in between the potato slices. I didn't try this, but next time I may. You can top the potato with butter or oil and some salt and pepper before baking. I sprayed mine with some oil. Bake at 220 for about 40 minutes. The potato skin will get nice and crispy while the flesh becomes soft. You can eat it just as it comes out of the oven or top it with anything you would top a normal baked potato. This was not much more work than a traditionally baked potato and it looks so much prettier!